| Table of Contents |
|---|
Overview and quick start guide
Release management app has embedded functionality for release notes generator. User can define multiple release notes templates for version and release and use them for the notes generation.
Release notes templates support rich text formatting. Furthermore, data from version or release (such as version or release fields, issues lists etc) could be automatically injected to the release body.
Quick start guide
In order to generate the first release notes follow a few simple steps:
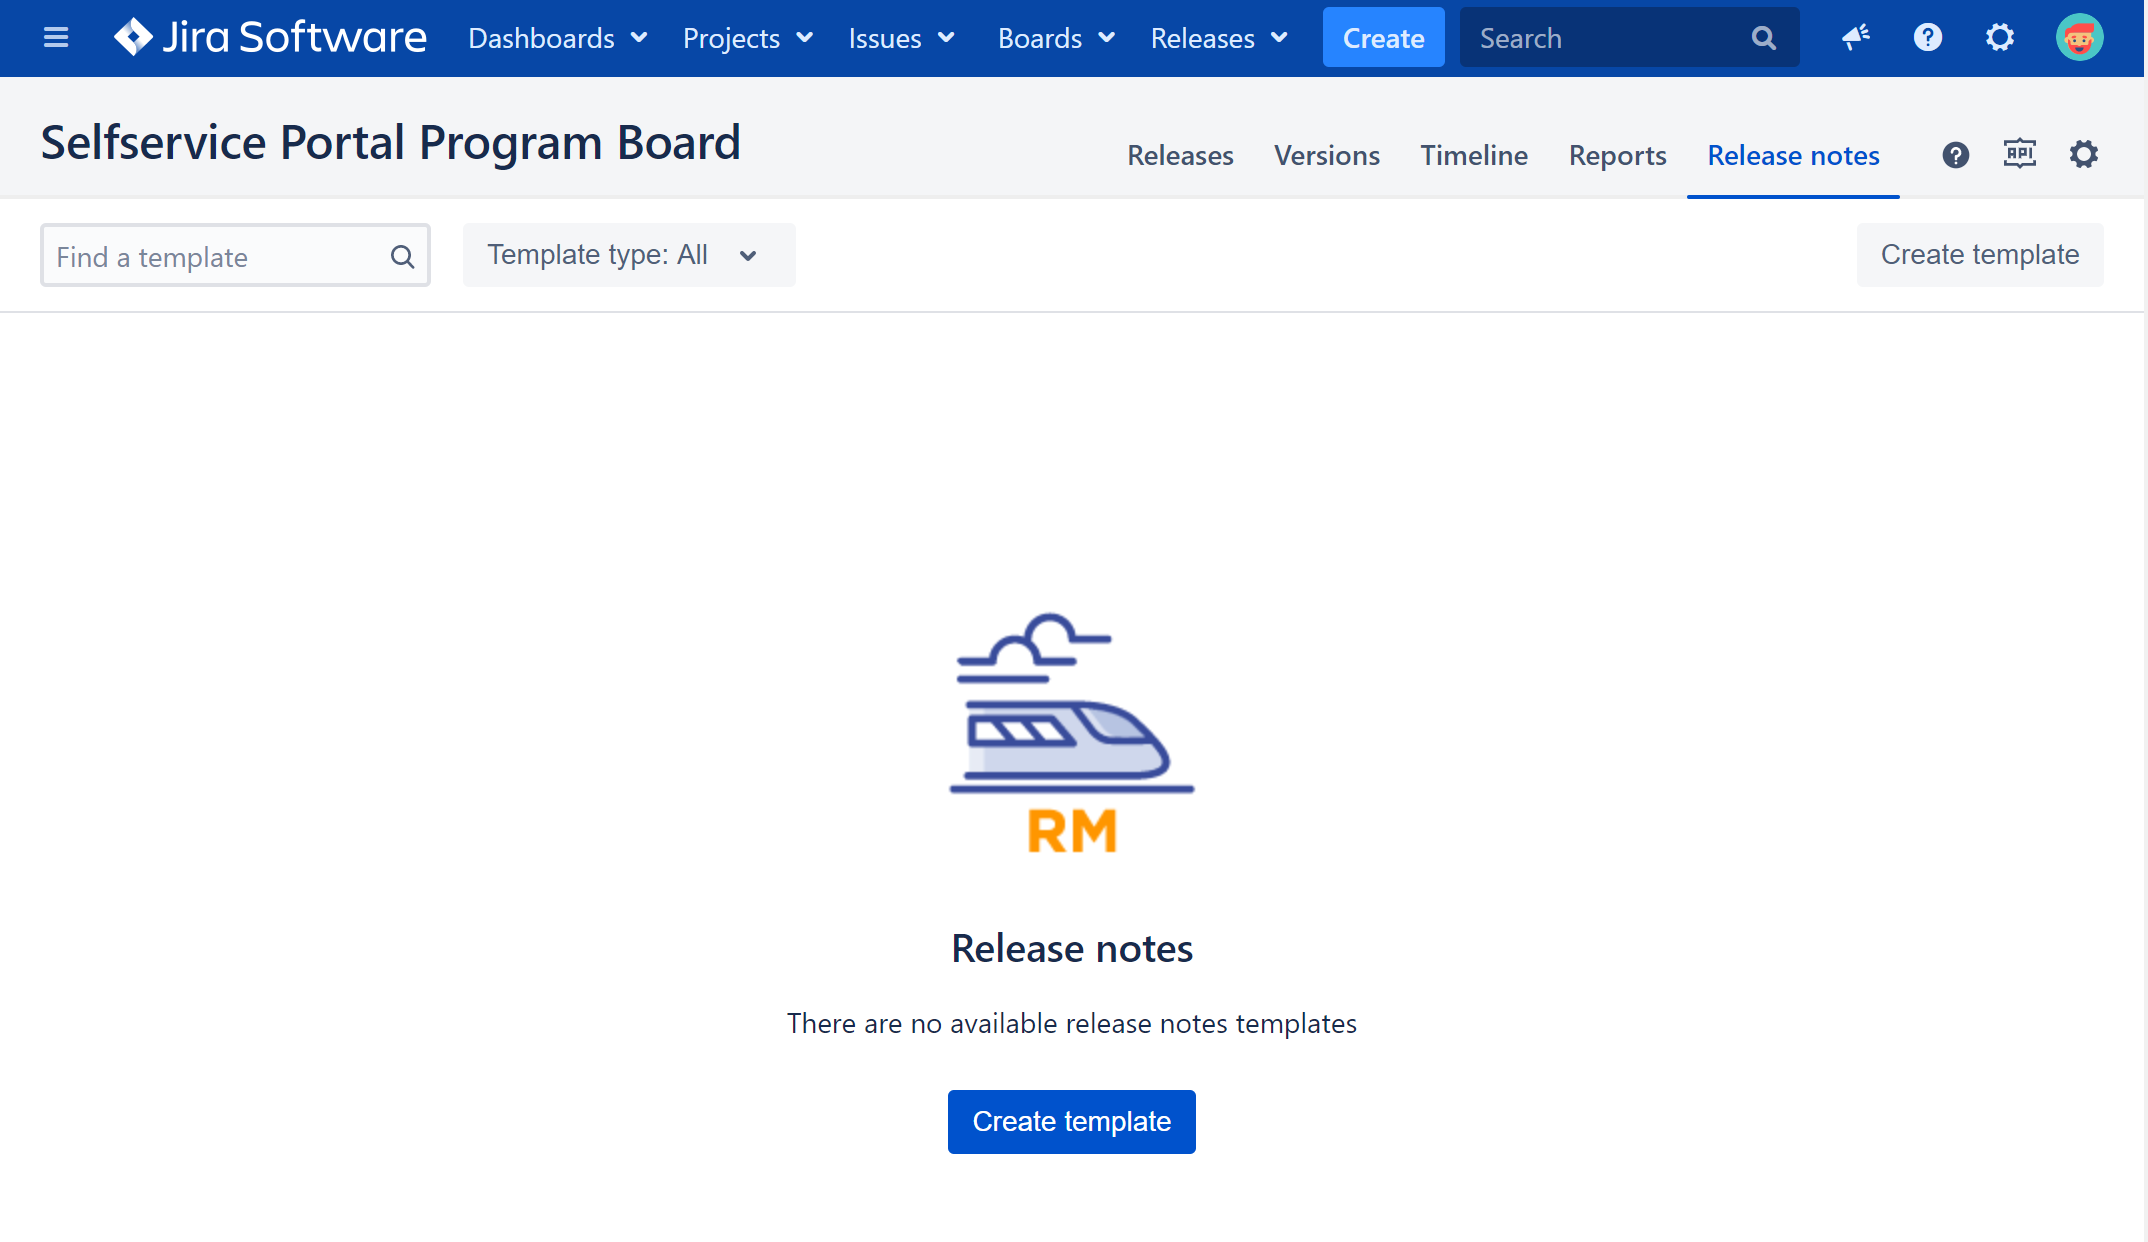
- Navigate to Release Notes tab in the main menu
- Click create template button:
- Specify template name and save a template with a default body:
- Click
 button
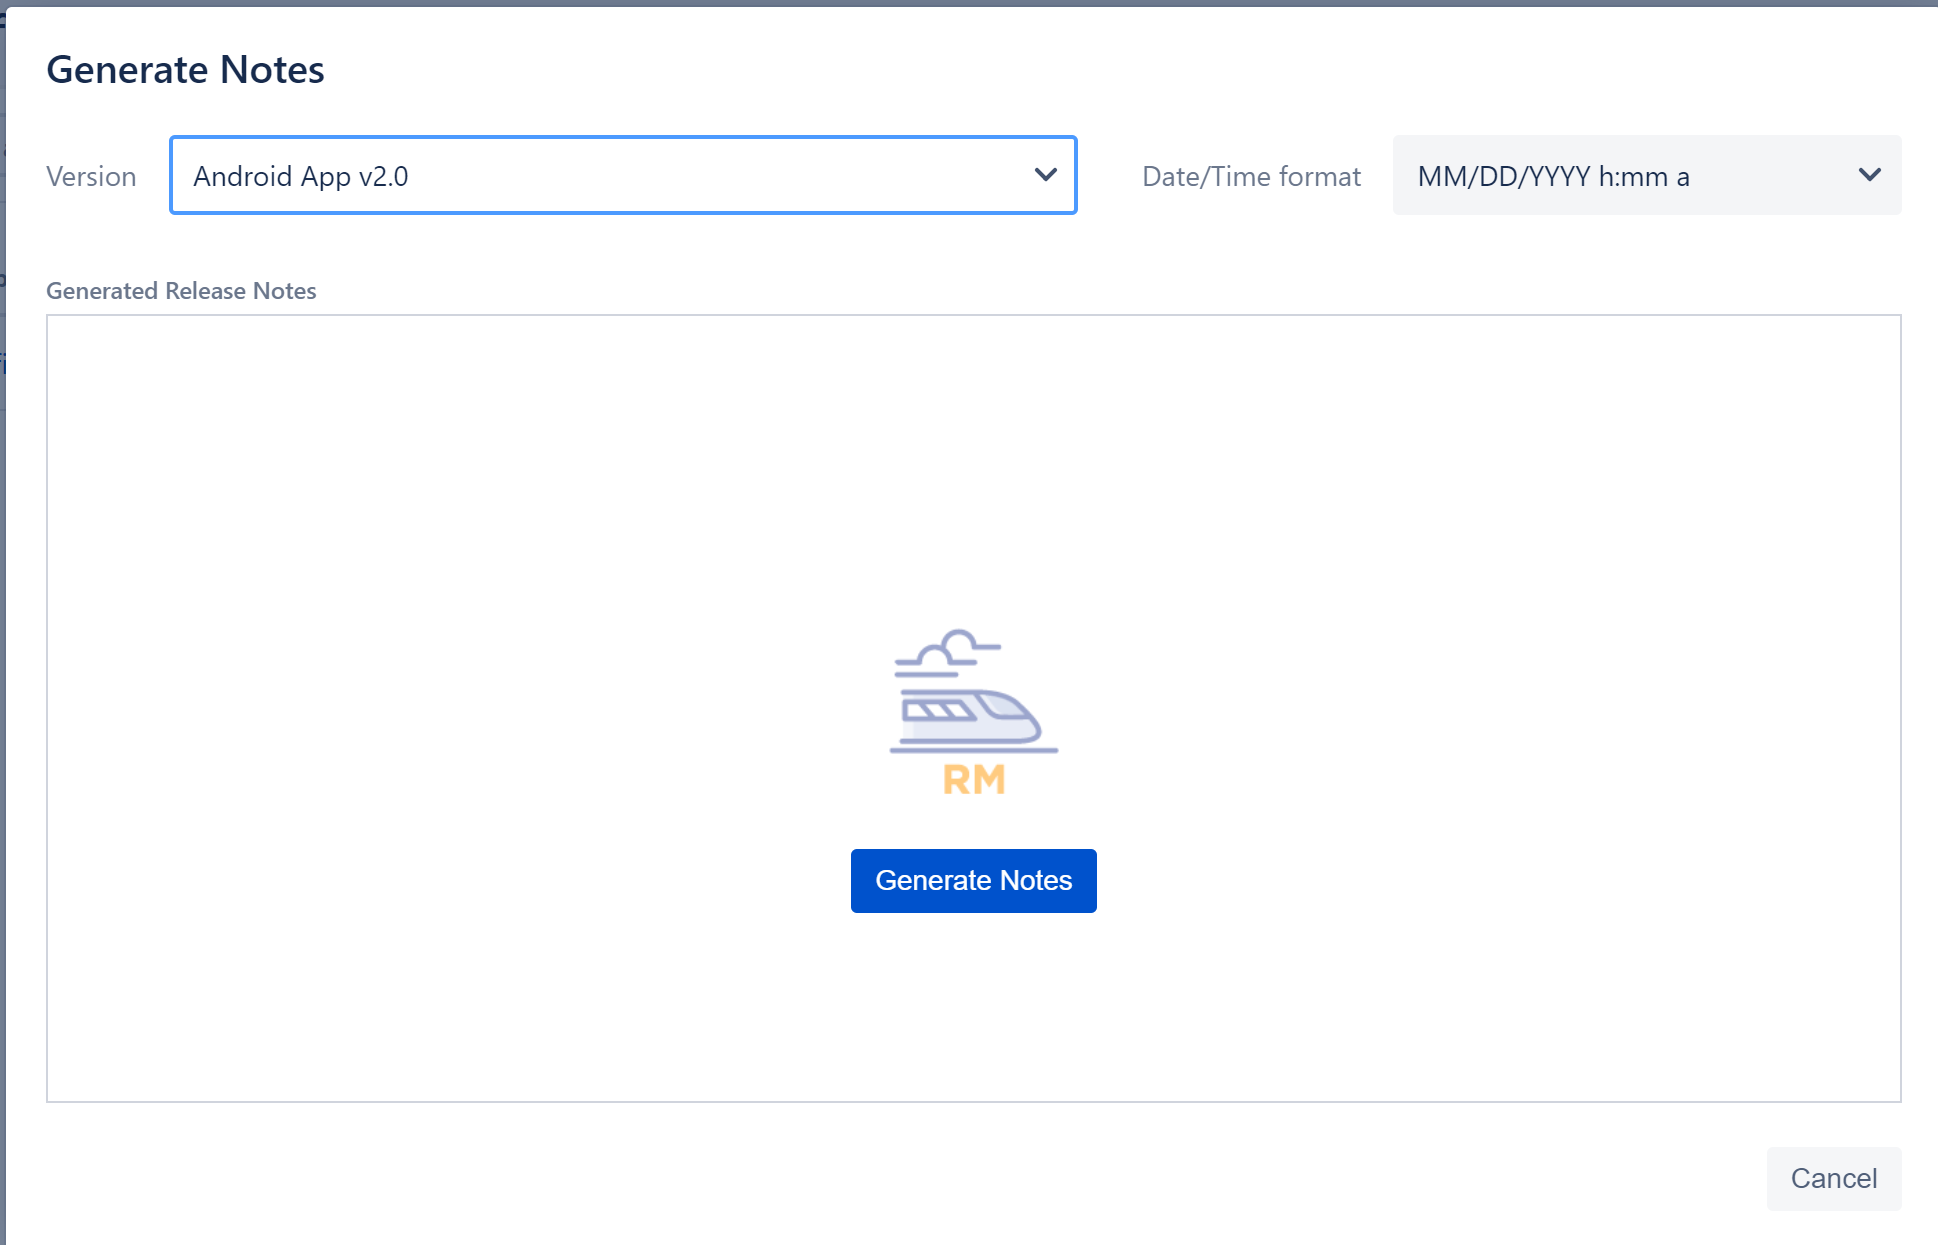
 - Choose version from a list an click button

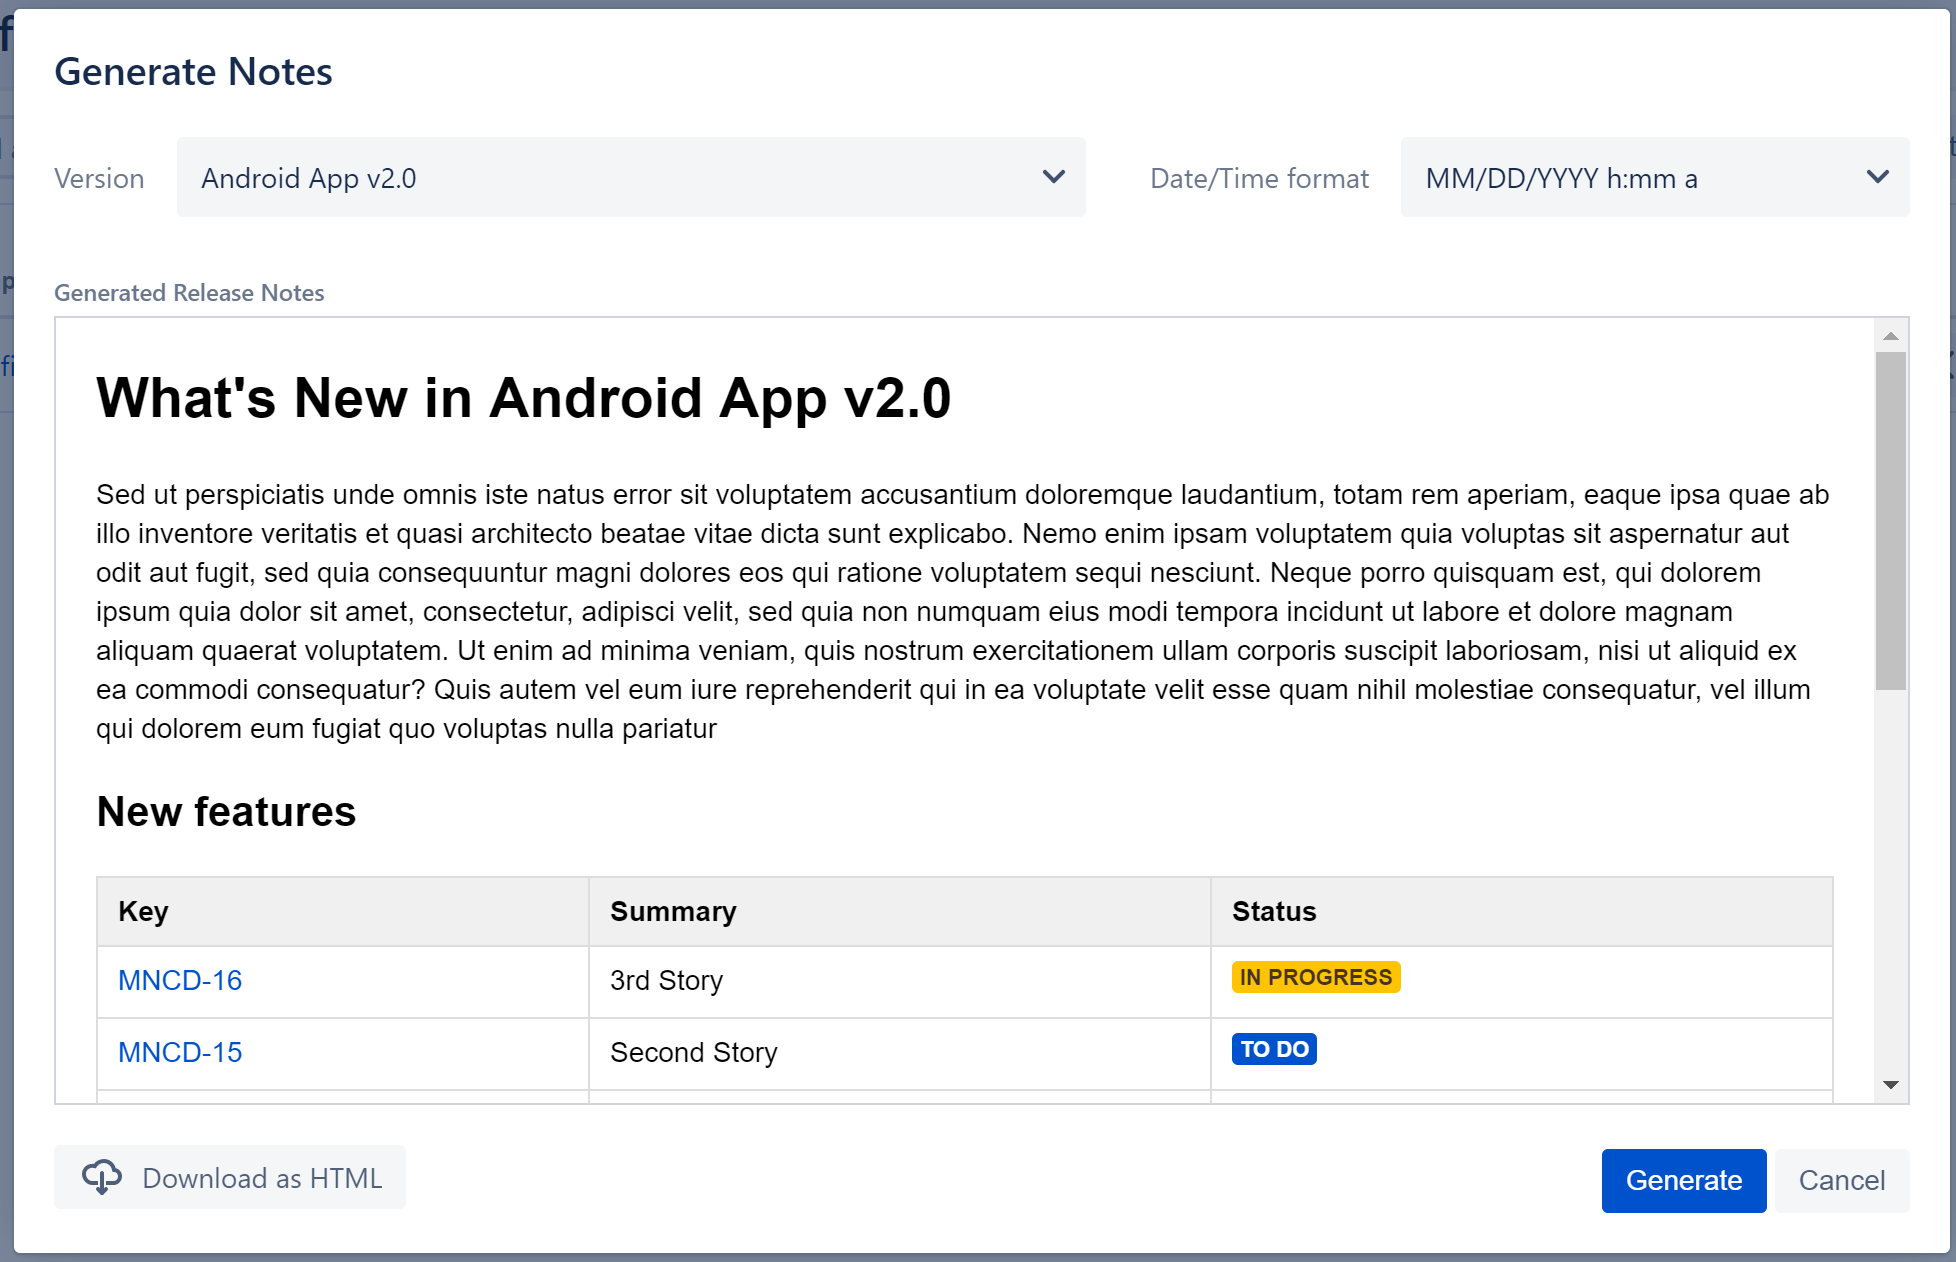
- Download generated release notes as HTML

Release notes templates
Templates operations
User can create, clone or delete release notes template.
| Info |
|---|
Template type could be defined while release notes template creation and can not be changed after that. |
Template body formatting and injectable variables
Following features are available for the rich text formatting:
...
The list of variables depends on template type: Version or Release.
Version variables
- Name
- Start date
- Release date
- Projected release
- Version delayed. "Not Delayed" or "Delayed" values will be injected to the notes depends on the version status
- Description
- Project name
- Project key
- User name. Name of a user who generated release notes
- Current date. Date when release notes were generated.
- Current timestamp. Date and time of release notes were generated.
Release variables
- Name
- Start date
- Release date
- Projected release
- Release delayed. "Not Delayed" or "Delayed" values will be injected to the notes depends on the release status
- User name. Name of a user who generated release notes
- Current date. Date when release notes were generated.
- Current timestamp. Date and time of release notes were generated.
JQL Table section
Table of issues based on JQL query could be added to the release notes body.
...
- Name of the section. A section with the same name will be added to the release notes.
- Section description. If the text is specified - it will be added as a plain text after the section name.
- JQL variables. In order to build flexible JQL which will use data from the selected version or release the user can inject variables to JQL query. List of available variables depends on the template type
- Version specific variables
- Version name
- Start date
- Release date
- Projected release date
- Project key
- User name
- Current date
- Current timestamp
- Release specific variables
- Start date
- Release date
- Projected release date
- Versions in release
- User name
- Current date
- Current timestamp
- Version specific variables
- JQL query to extract an issue list.
- If the option is enabled the section will be rendered if JQL will return 0 rows. Otherwise, the section will not be rendered at all.
If this option is enabled all the issue will be grouped by respected Jira Epics.
Info title Release template type For Release templates you can choose an option whether to group by Epic or Version
- The message which will be injected to a template if JQL will return 0 rows. This option will be working in case a switcher #5 is turned on.
Columns to be shown in the table. User can select the majority standard and custom Jira fields. See details in the chapter below.
Info title Hint In order to extract all issues in version use JQL: fixVersion={version.name}
For all issues in the release: fixVersion IN ({release.versions})
Columns configuration
On the "Columns" tab the user can define a list of columns to be presented the table.
...
User can change columns order.
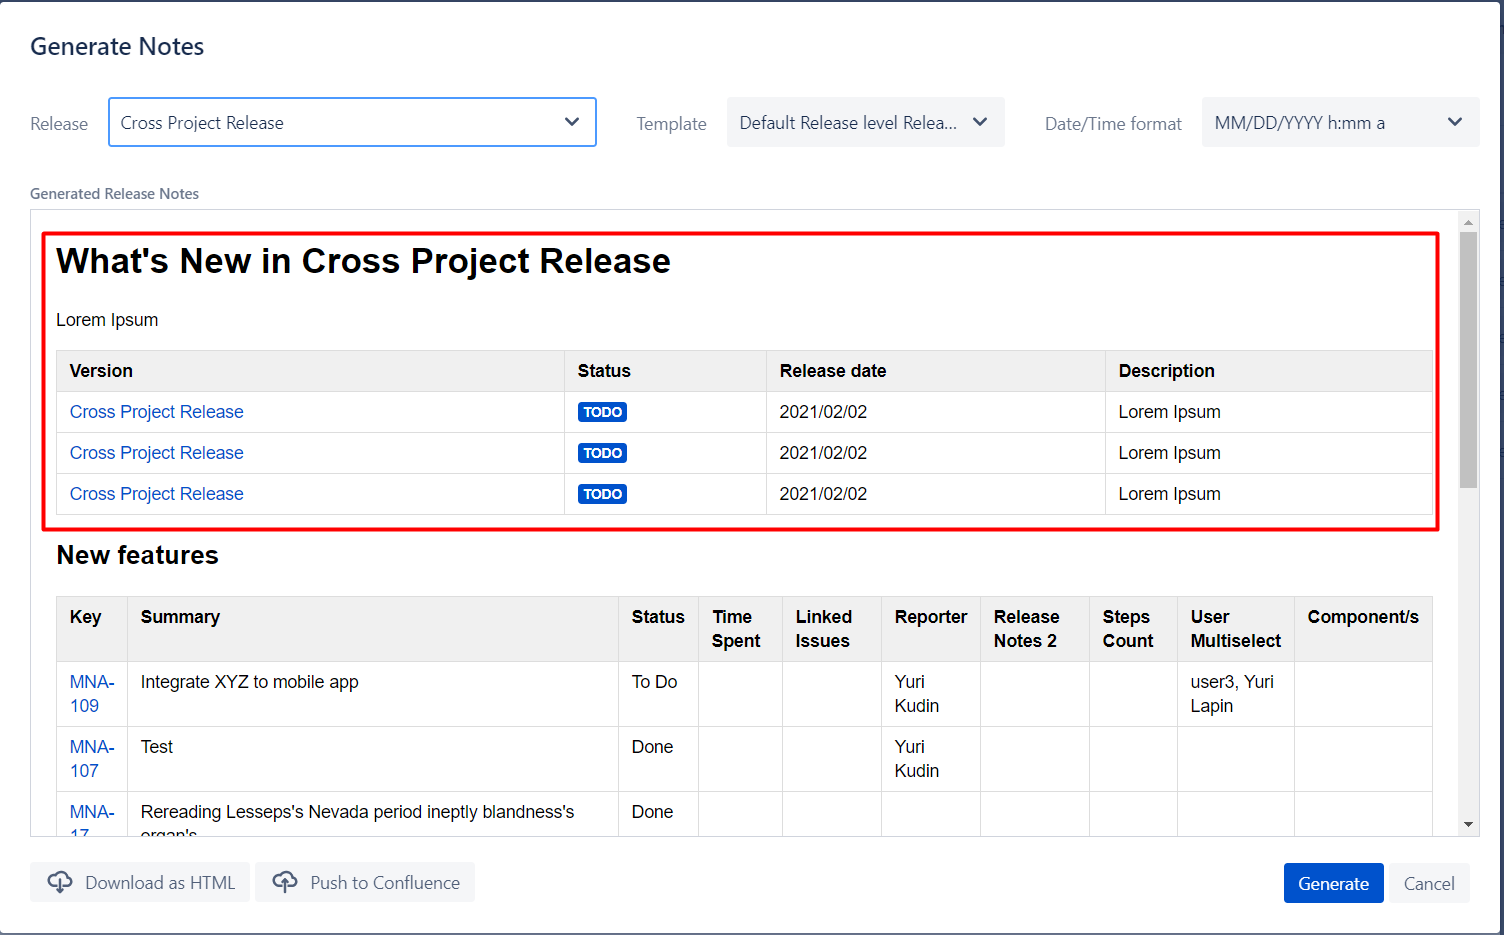
Release Versions section
For release templates you can pick up a "Release versions" table to outline the specific components and it's versions comprising your business release.
...
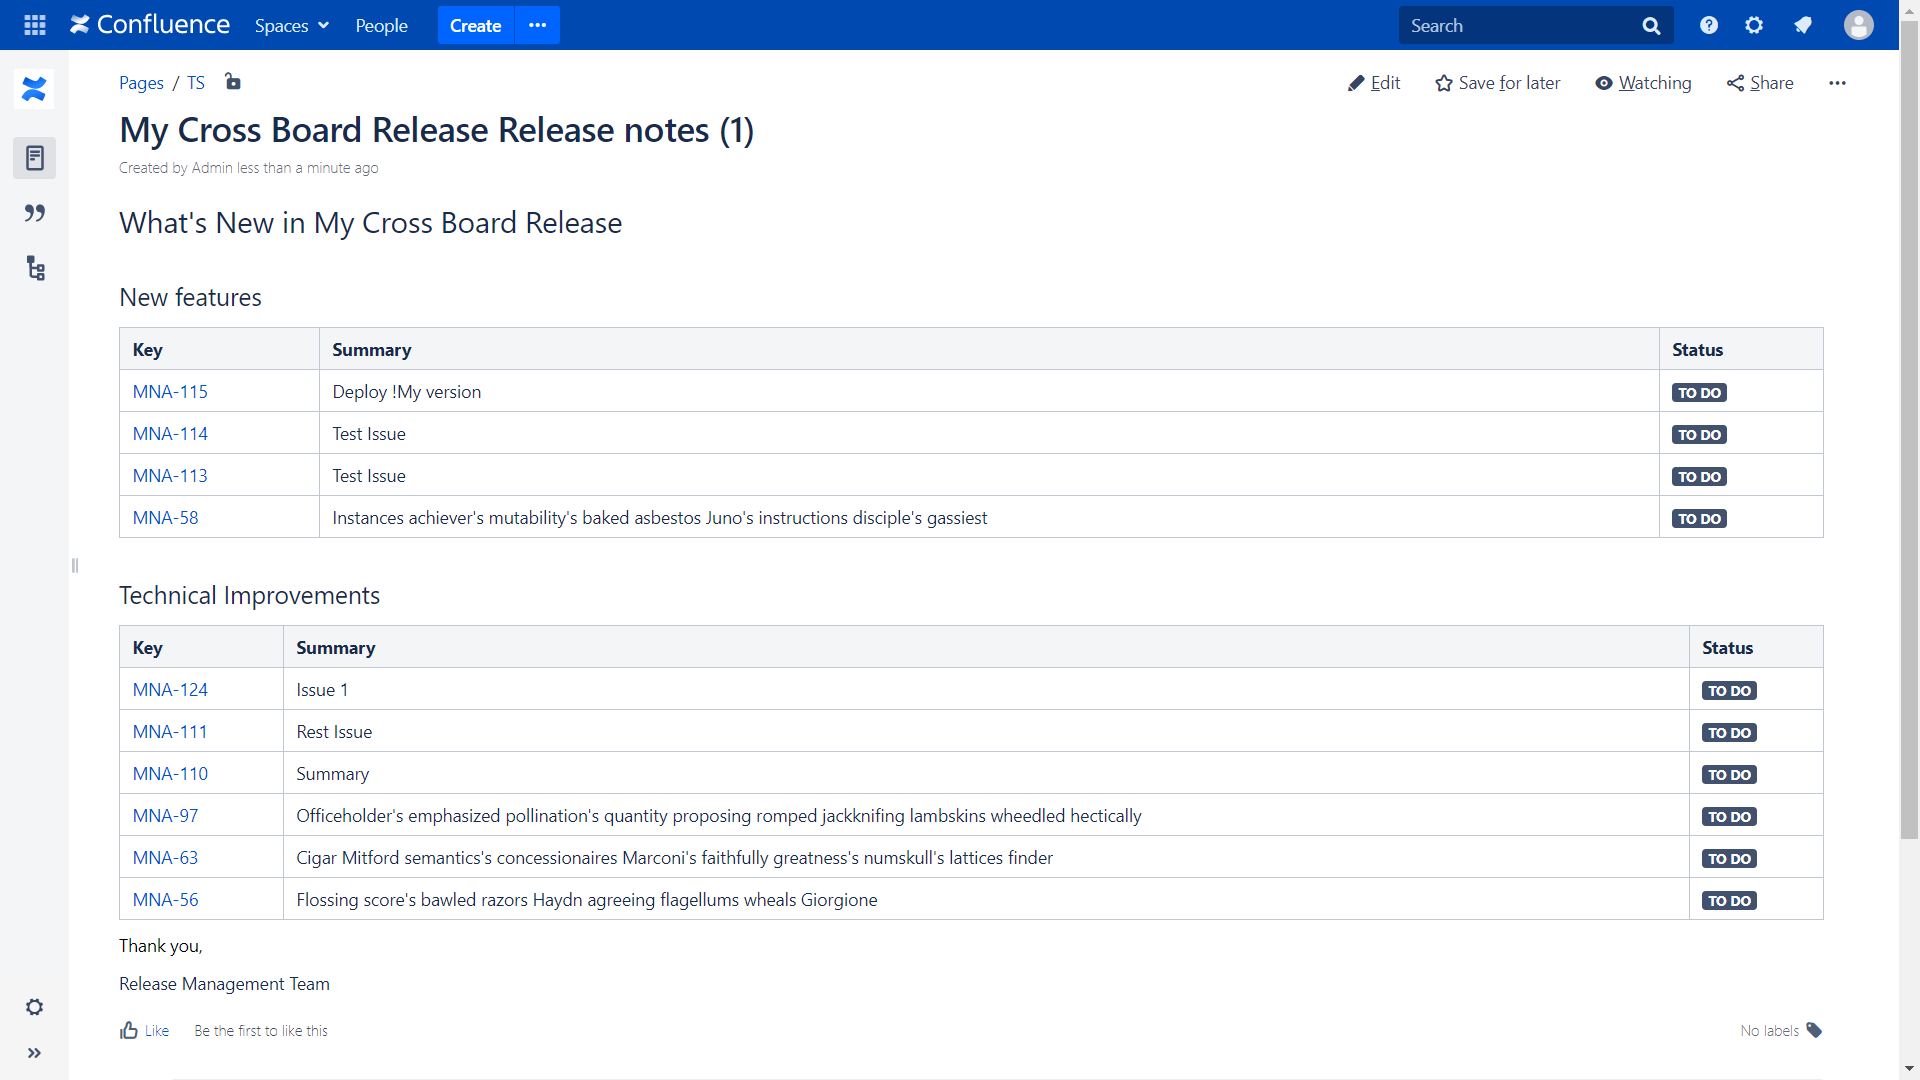
The output of the table looks like the following
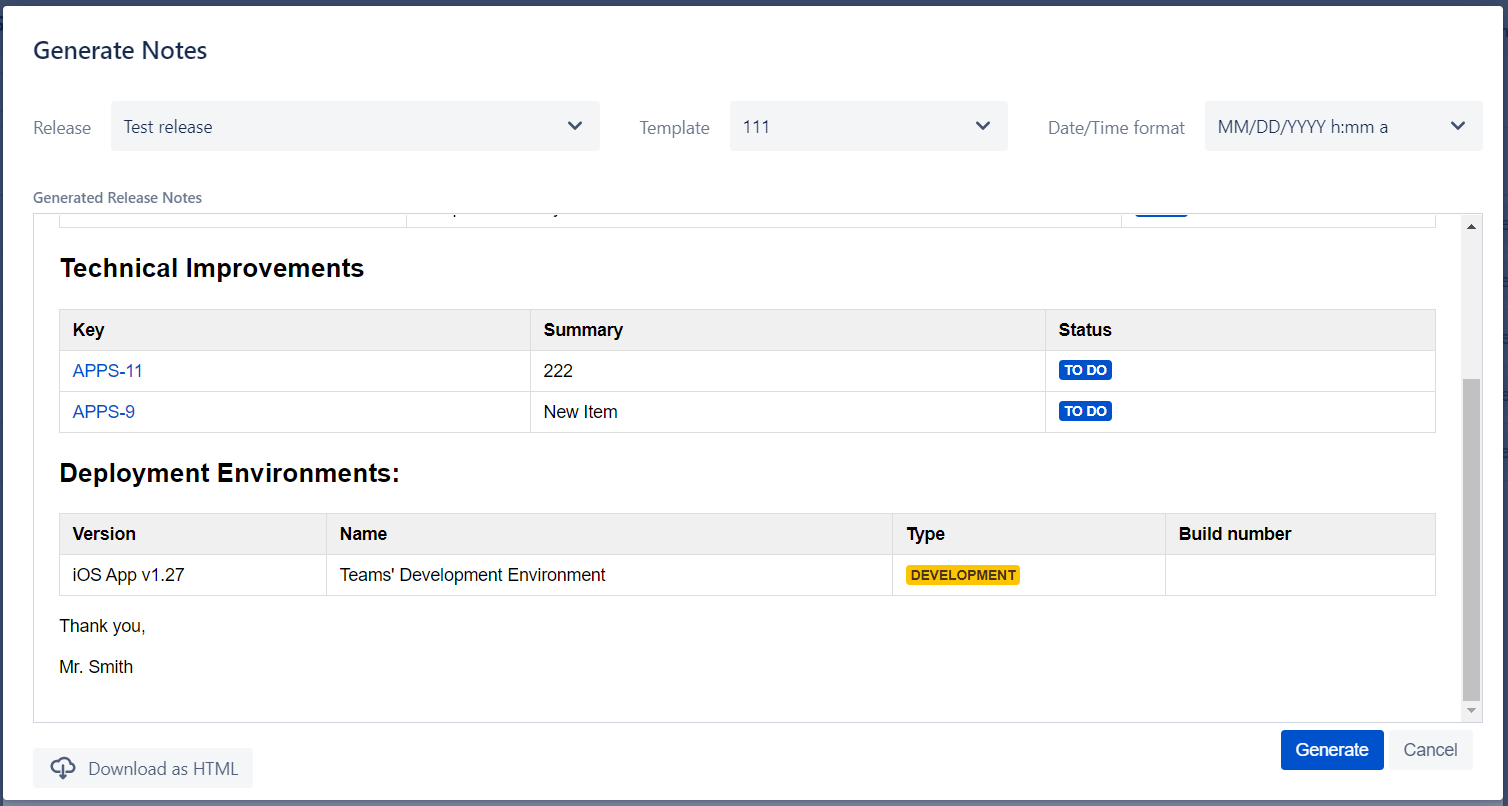
Environments Table section
If you want to add Deployment Environments details to your Release Notes you can add "Environments table" to your template.
...
The feature could be used for both version-specific and release-specific templates. For release-specific templates the table will show all the included versions and their Deployed Environments, e.g.
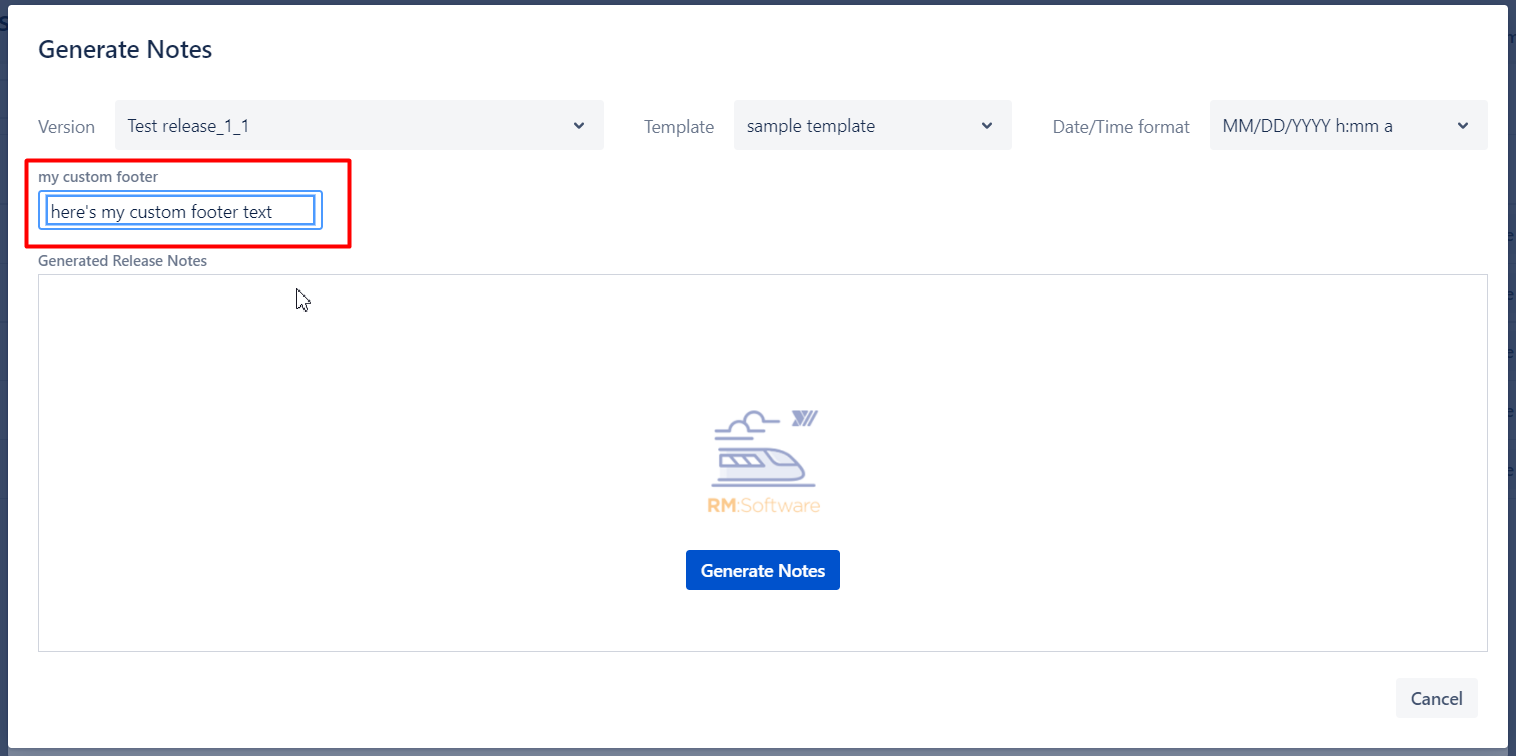
 Custom variables
You can define a set of free text variables that you would need to populate with each and every report generation. This is a useful workaround for the custom fields that we do not support for versions and release. Also might be a solution to extend our standard variables list with your own list.
...
Once you click "Generate" you will be asked to select a version and package as well as specify all free text variables for your notes

Export options
Download as HTML
The output on Release Notes could be downloaded as HTML
...
You can use it to Copy/Paste into MS Word, Google Docs, Confluence and any other wiki with (almost) no changes to layout. See other options below plus Upcoming Features for more formats we plan to support shortly.
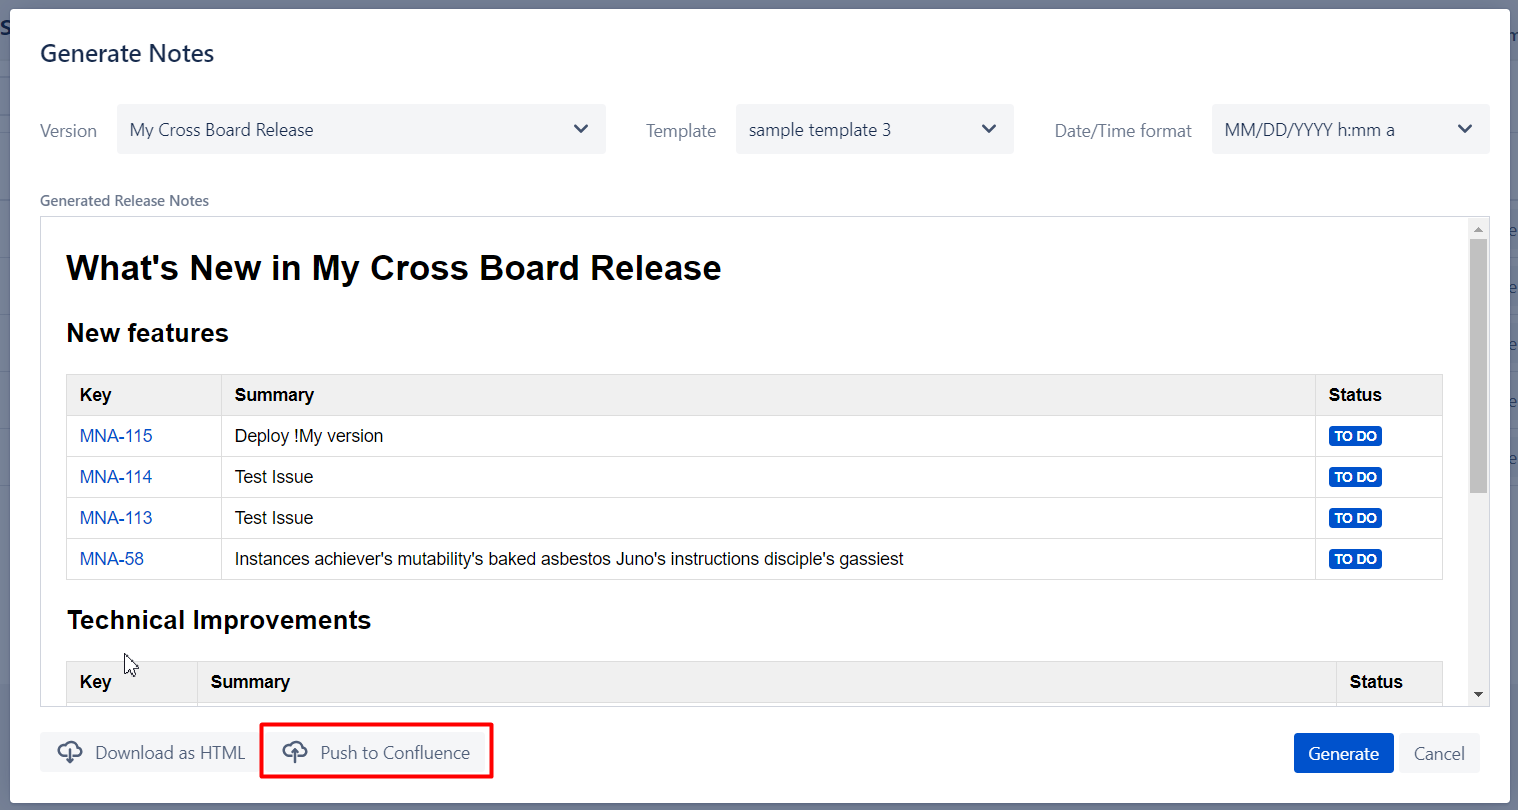
Upload to Confluence
To substitute “Copy/Paste to Confluence” we implemented a direct integration with Confluence to upload into one of your available spaces.
Getting started
Authentication via token (Confluence 7.9 or later)
In order to upload your release notes to Confluence Release App need to authenticate to act on behalf of user.
...
| Info |
|---|
We keep your token ONLY in your browser storage in encrypted way to use during next uploads. |
Troubleshooting connectivity
Token based authentication should work out of the box w/o any fuss. In case there are some issues with that and you can't upload you release notes to confluence we suggest to assure there's a connectivity established from Jira Server to Confluence server via HTTPS.
Basic Authentication
Less secured authentication option for Confluence version 7.9 or later is "Basic Authentication". Also default for previous versions of Confluence.
...
| Info |
|---|
We also keep this information in encrypted way in your browser local storage so there's no need to renter every time you want to upload to Confluence. |
Troubleshooting connectivity
With basic authentication there's usually some fuss with connectivity.
...
| Info |
|---|
"Access to fetch at ‘https://confluence.your_company_domain.com/rest/api/content’ from origin ‘http://jira.your_company_domain.com’ has been blocked" or "Network error or CORS is not configured on your Confluence instance" |
... it's because Cross-Origin Resource Sharing (CORS) is not enabled for your Confluence Server as result the requests which are coming from Jira are not accepted.
To overcome please follow the instructions below
- Stop Confluence server
- Navigate to your confluence home directory (Usually for Linux: /opt/atlassian/confluence/)
- Open confluence_home_directory/confluence/WEB-INF/
- Backup web.xml
- Open web.xml for editing
Add the flowing code block after the last <filter>...</filter>.
Info Please replace "https://jira.your_company_domain.com" to your Jira URL.
Code Block linenumbers true <filter> <filter-name>CorsFilter</filter-name> <filter-class >org.apache.catalina.filters.CorsFilter</filter-class > <init-param> <param-name>cors.allowed.origins</param-name> <param-value>https://jira.your_company_domain.com</param-value> </init-param> <init-param> <param-name>cors.allowed.methods</param-name> <param-value>OPTIONS,GET,POST,PUT,DELETE</param-value> </init-param> <init-param> <param-name>cors.exposed.headers</param-name> <param-value>Access-Control-Allow-Origin,Access-Control-Allow-Credentials</param-value> </init-param> <init-param> <param-name>cors.allowed.headers</param-name> <param-value>X-Atlassian-Token,Authorization, Content-Type,X-Requested-With,accept,Origin,Access-Control-Request-Method,Access-Control-Request-Headers</param-value> </init-param> <init-param> <param-name>cors.support.credentials</param-name> <param-value>true</param-value> </init-param> </filter> <filter-mapping> <filter-name>CorsFilter</filter-name> <url-pattern>/rest/api/*</url-pattern> </filter-mapping>- Save changes
- Start Confluence server and make sure that the server has been successfully started. If no, restore web.xml from backup
...
4. Add your Jira host and click the checkbox “All incoming“
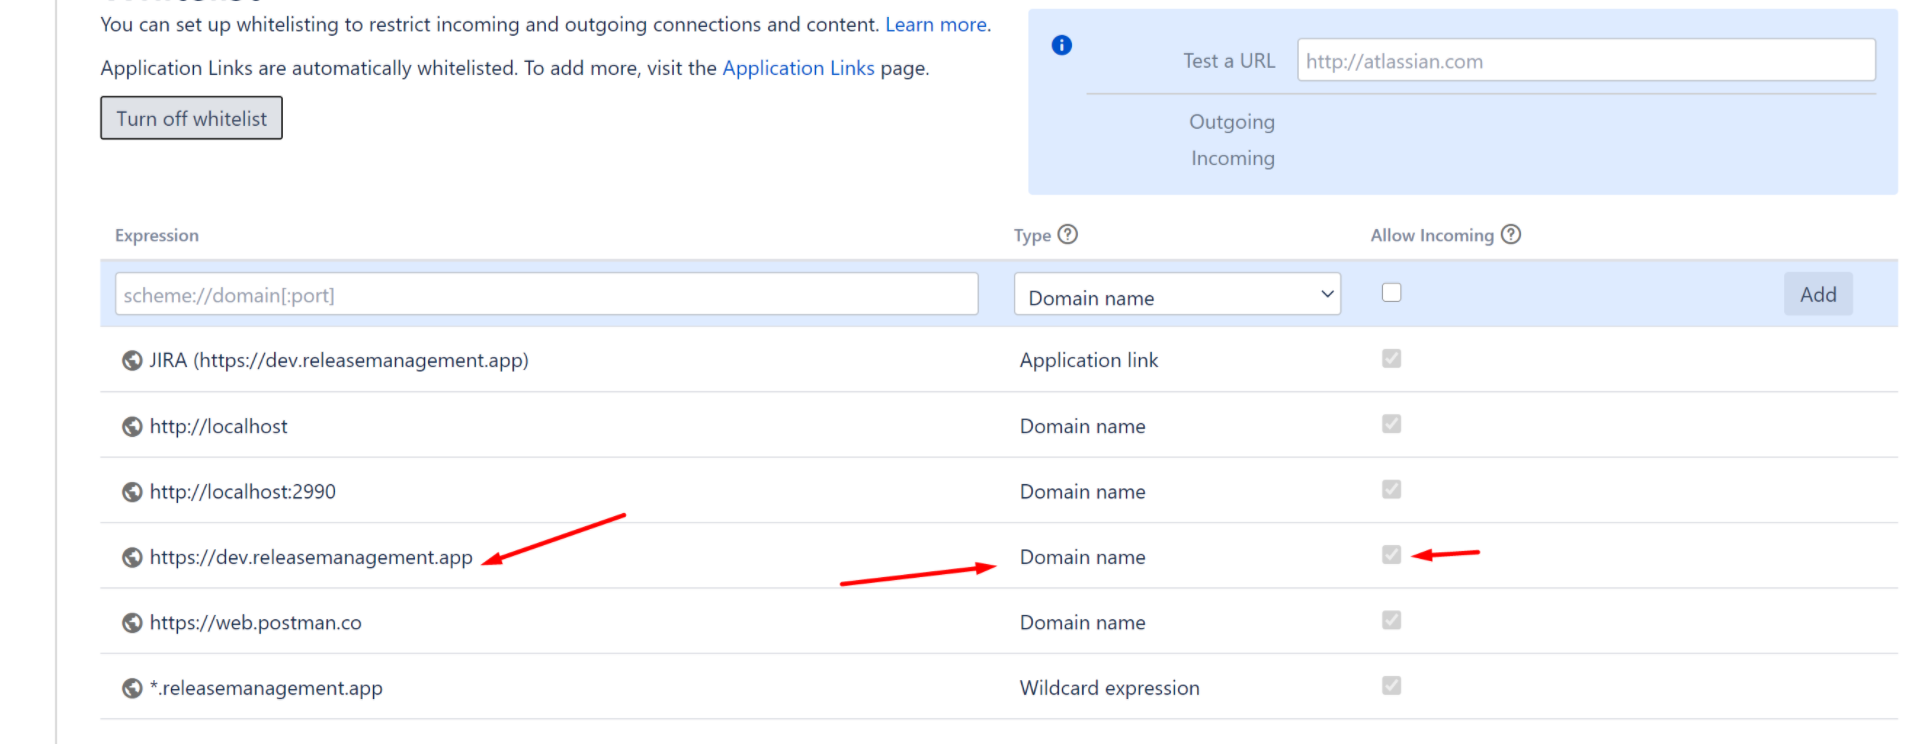
5. Test Jira URL

Configuring the destination
If you already connected to confluence you will see the following dialog to help us define the destination to upload your release notes
...
Click on the link specified to navigate to your release notes in confluence.
...
Propagating Confluence link to Jira issues
You have an option to automatically add Confluence link with generated notes to all encompassing Epics. To do so turn on "
...