Overview
Release management app has embedded functionality for release notes generator. User can define multiple release notes templates for versions and packages and use them for the notes generation.
Release notes templates support rich text formatting. Furthermore, data from version or package (such as version or package props, issues lists and etc.) could be automatically injected into the notes body.
Quick start guide
In order to generate your first release notes please follow a few simple steps:
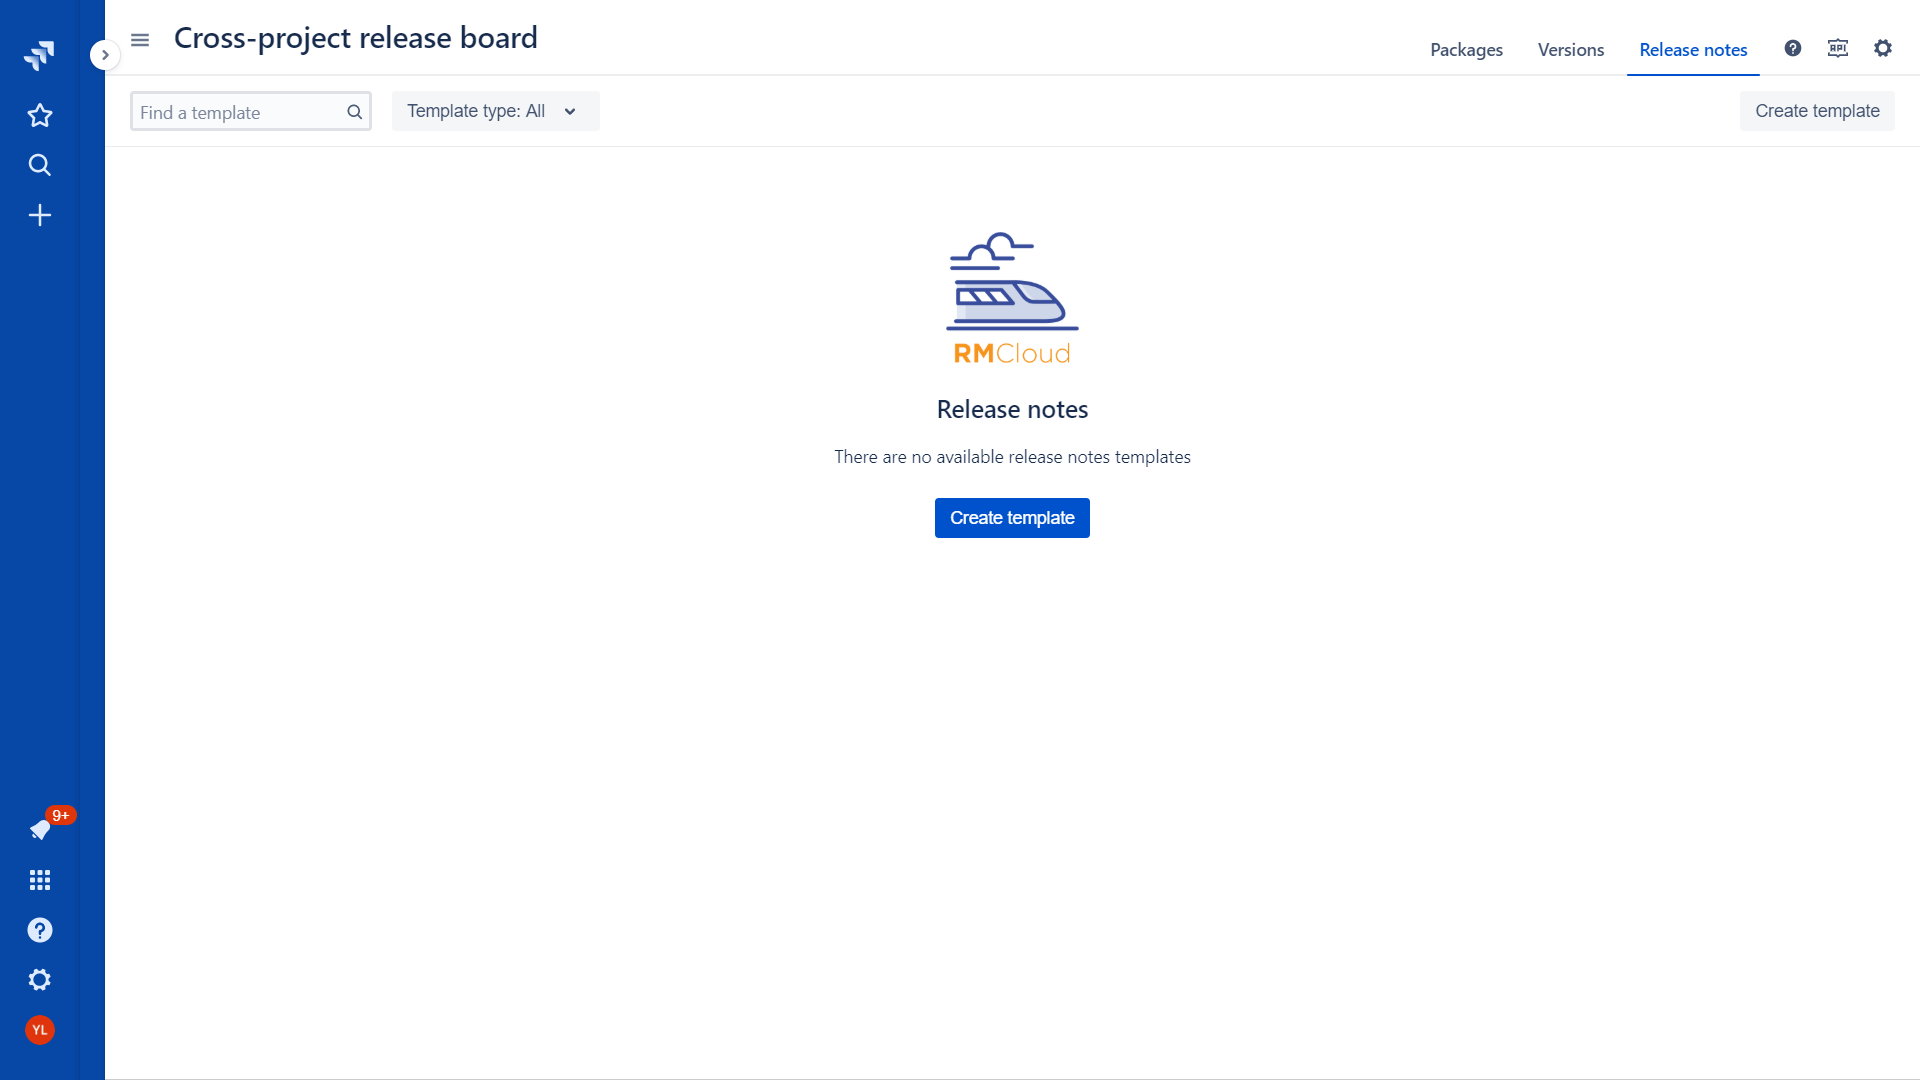
Navigate to “Release notes” tab in the board menu
Click create template button:
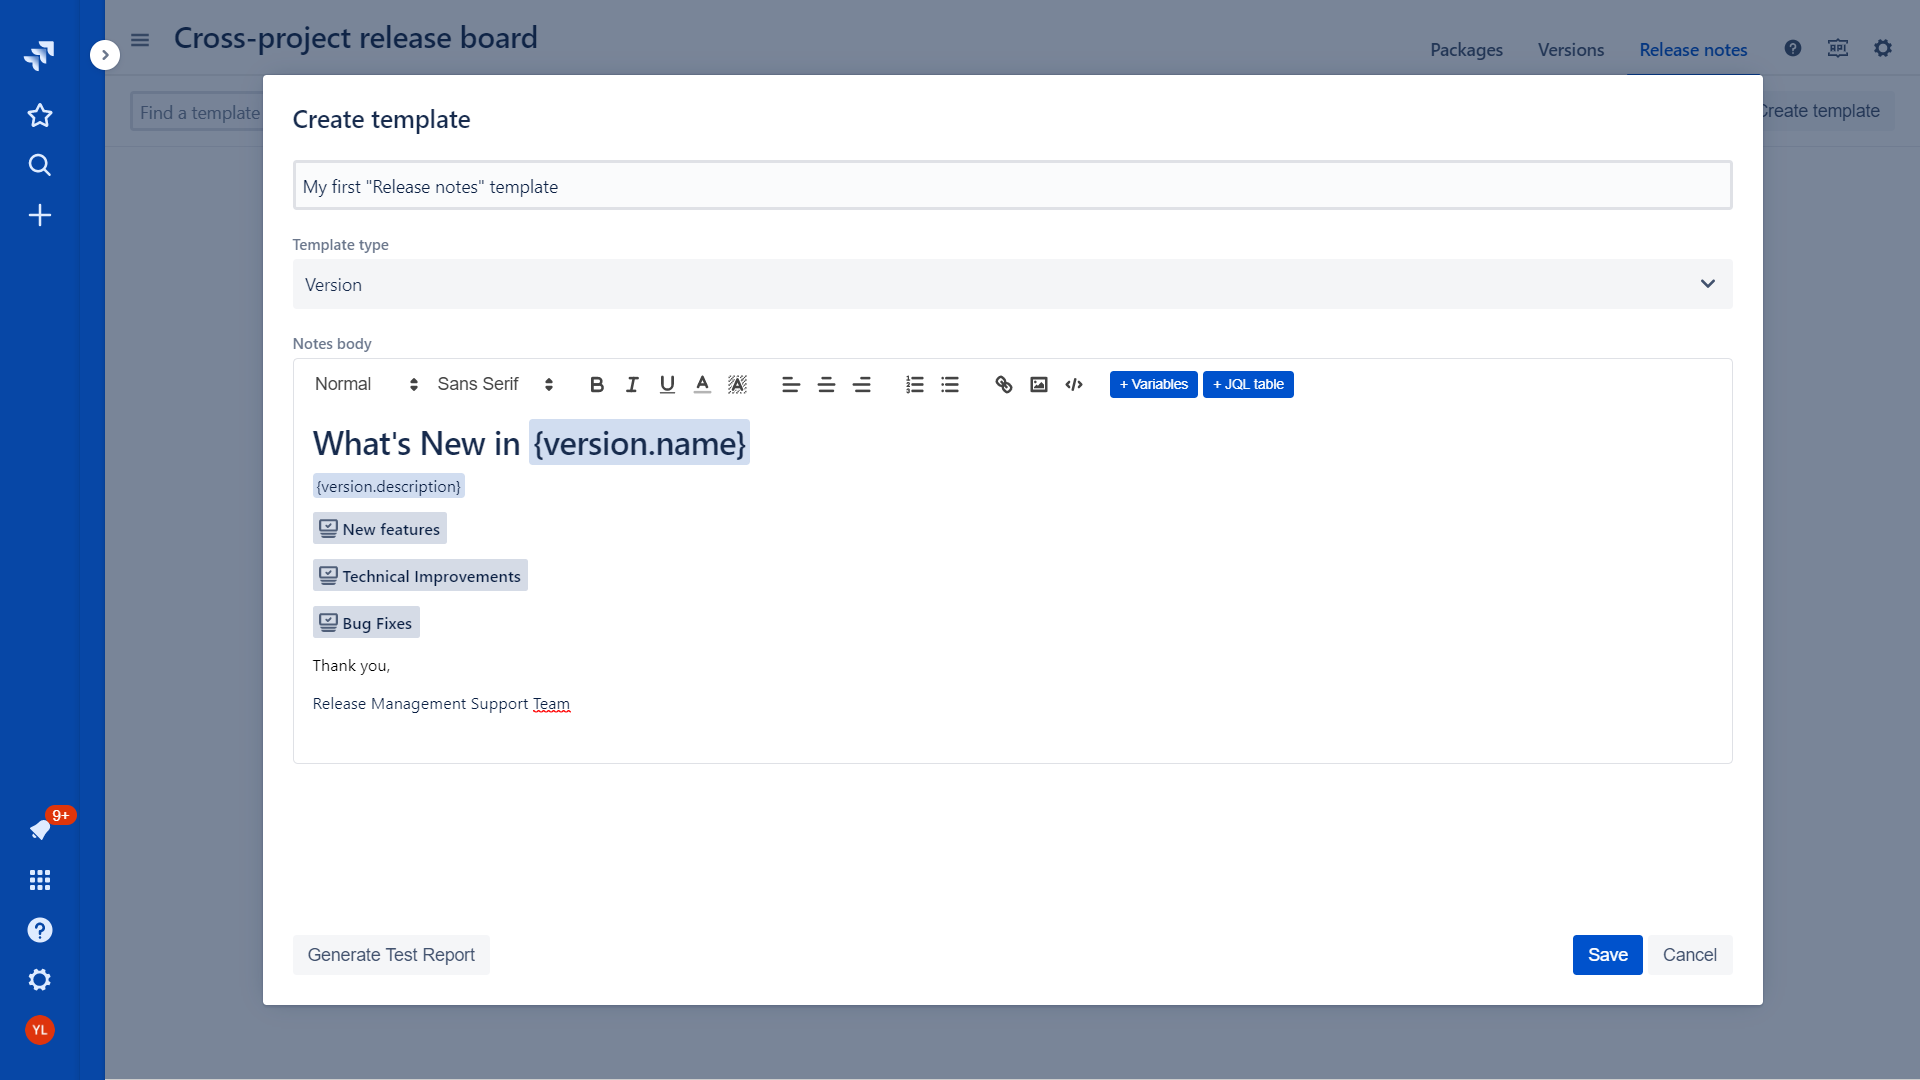
Specify template name and save a template with a default body:
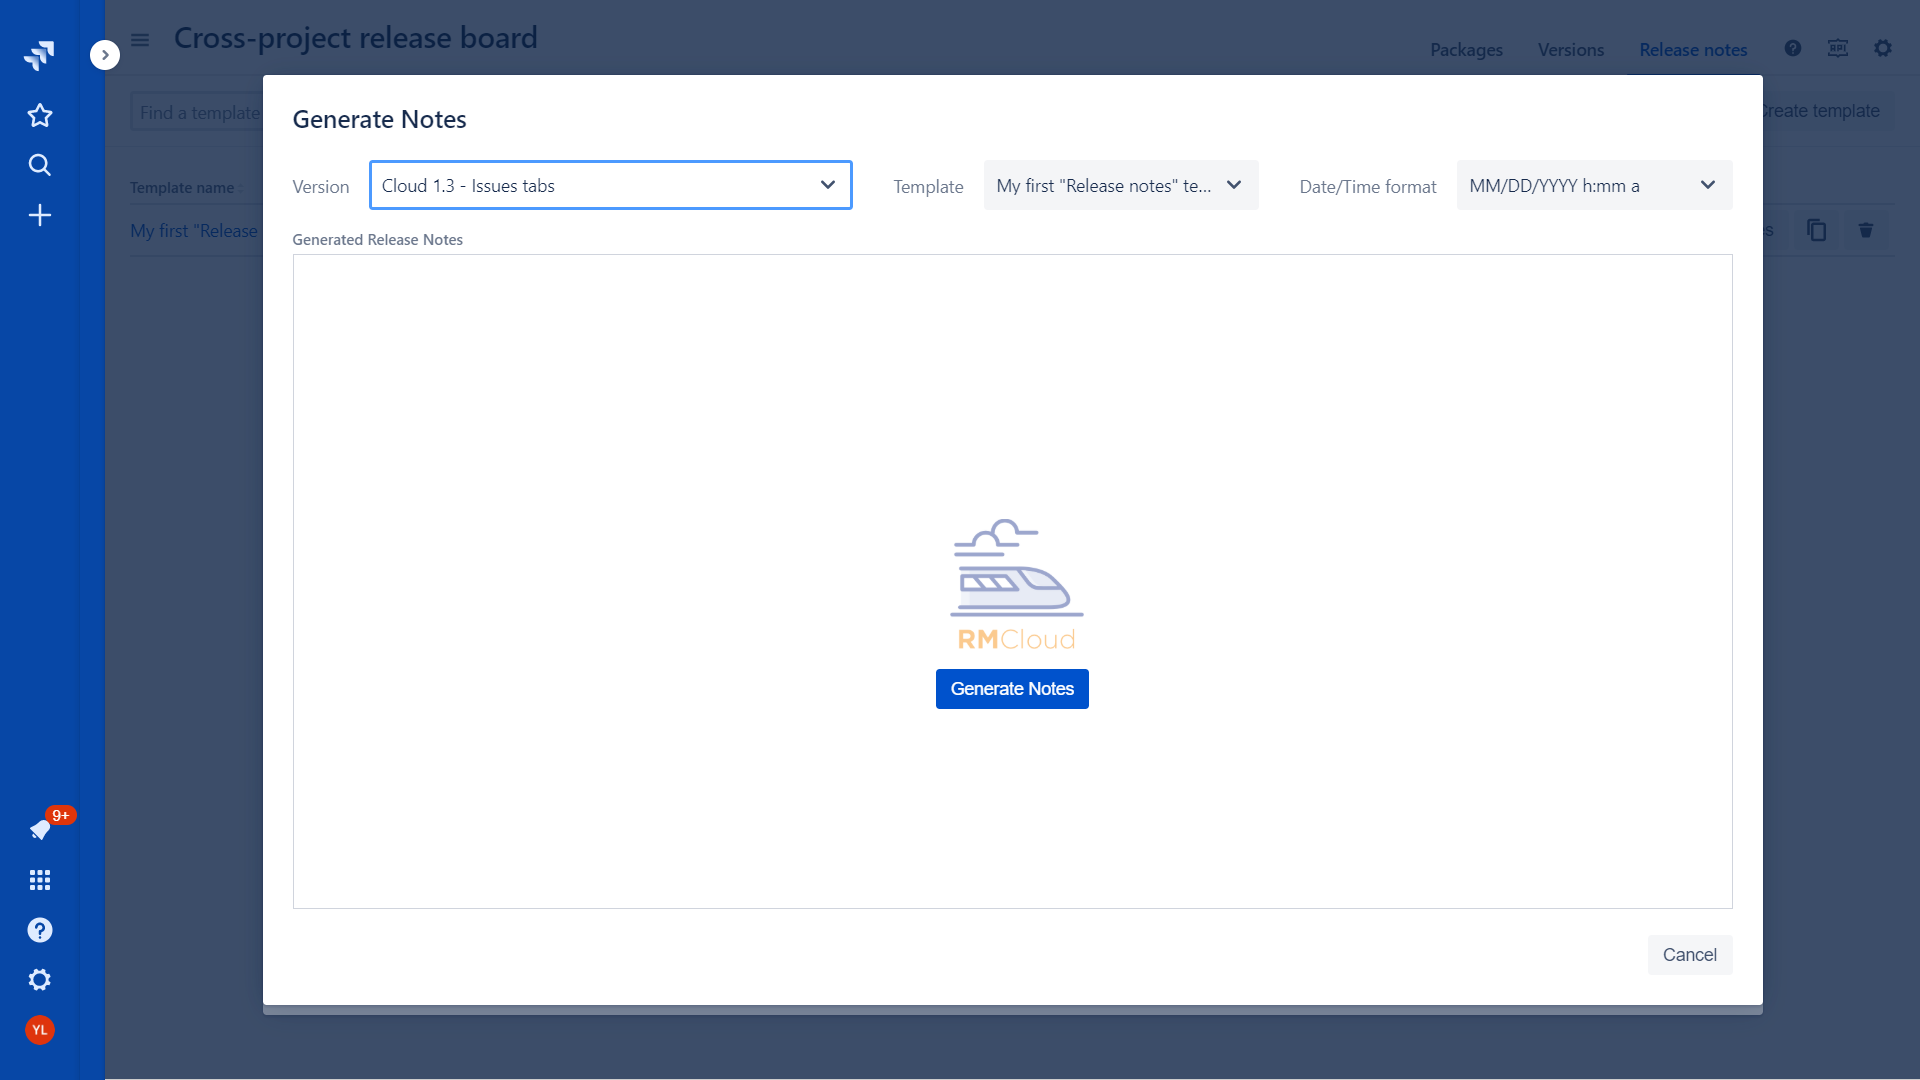
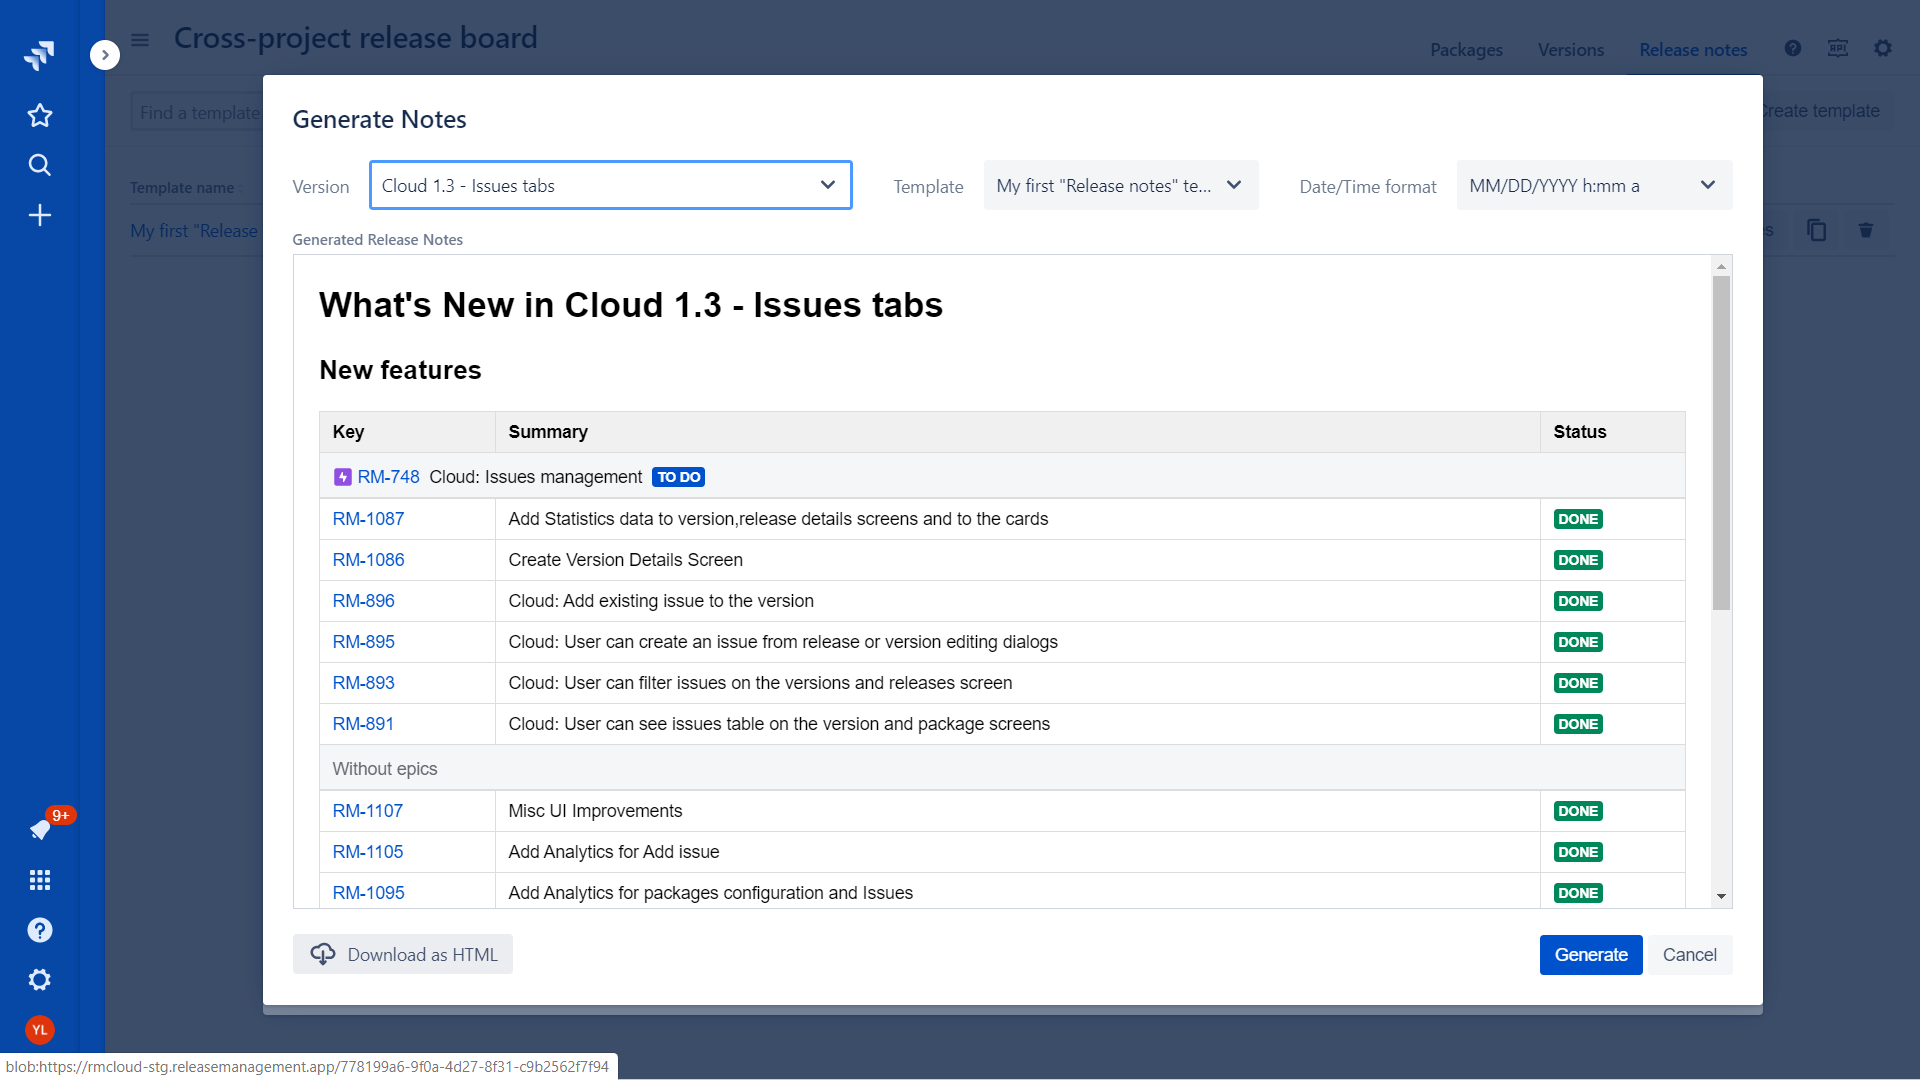
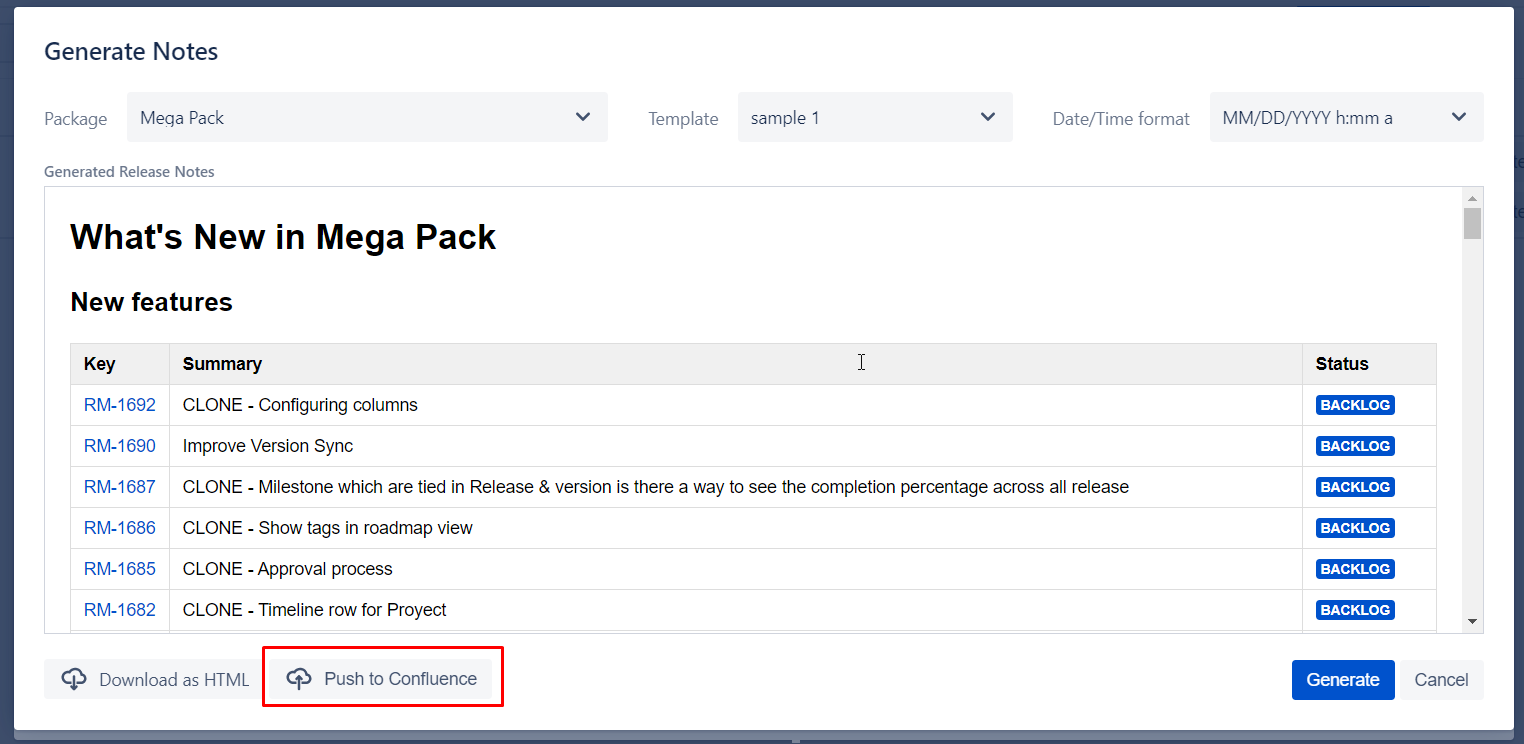
Click “Generates Notes“ button
Choose version from a list and click “Generates Notes“ button
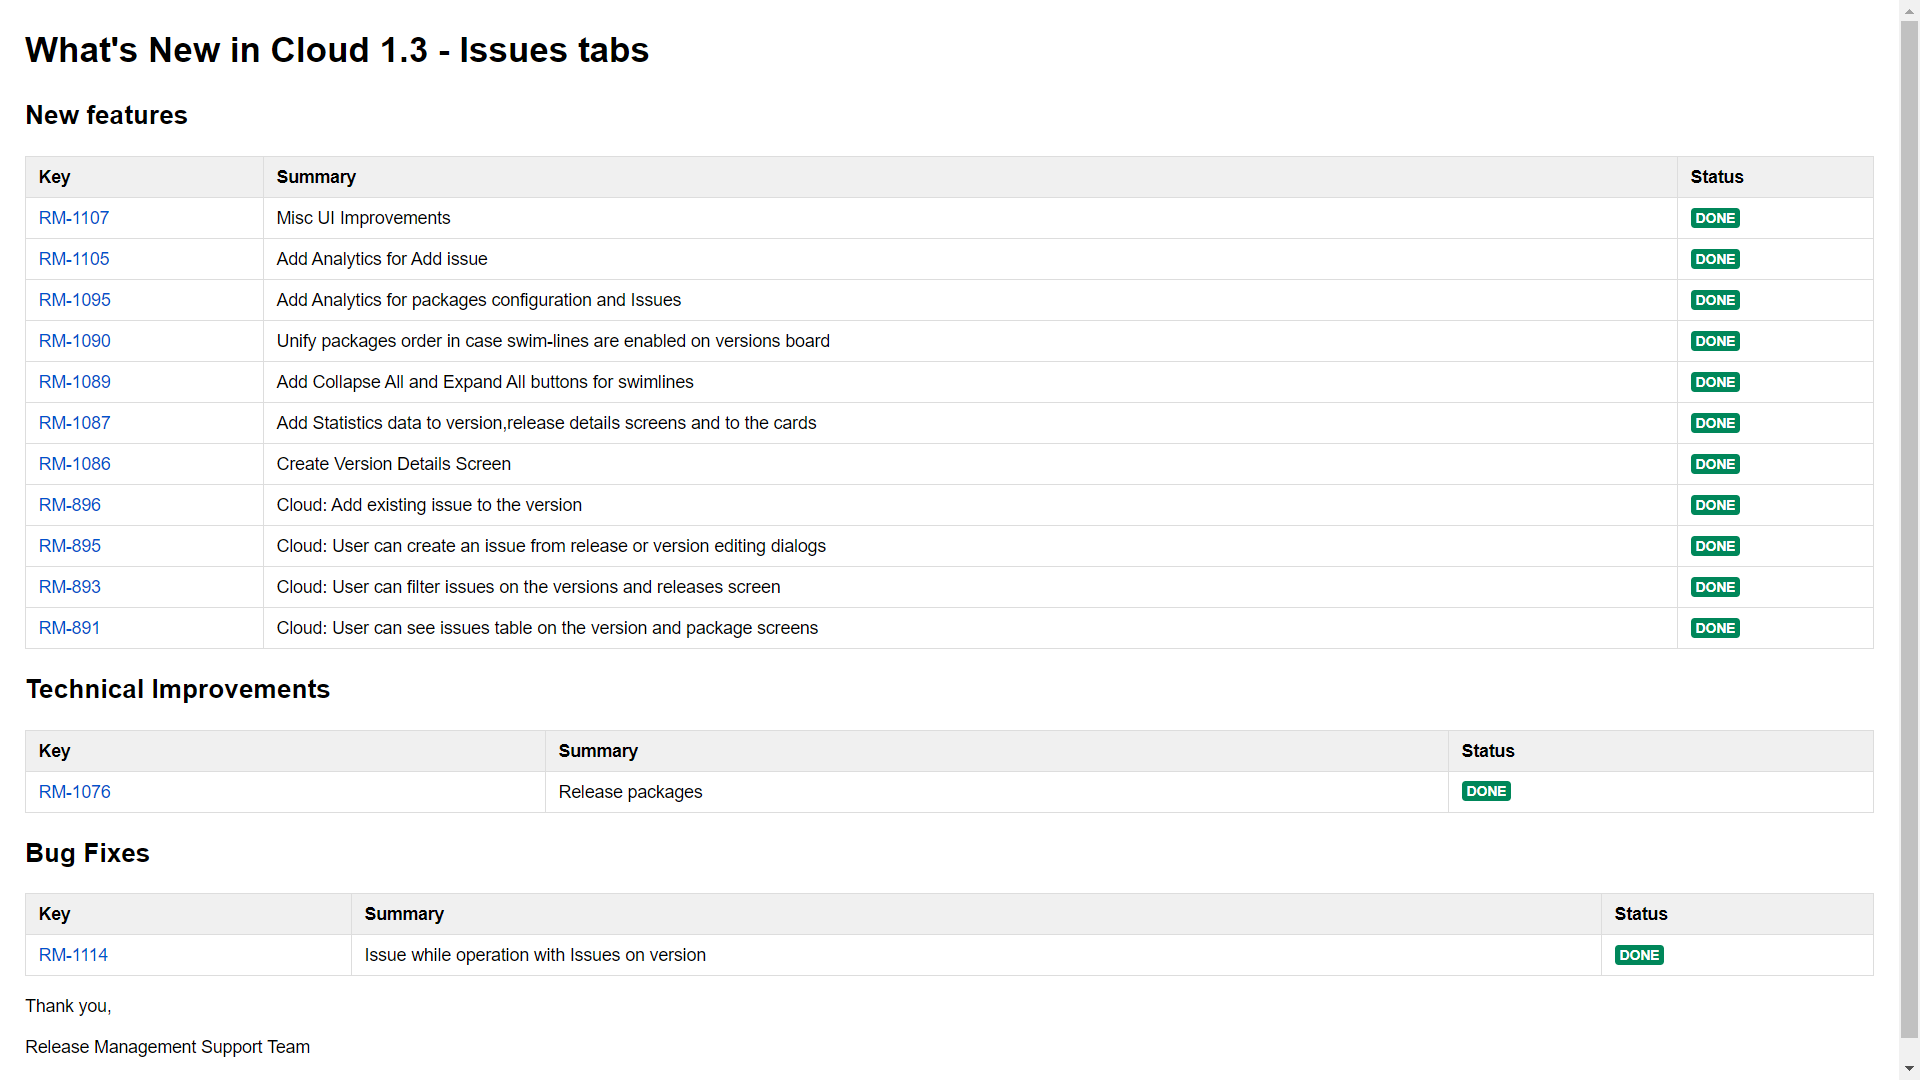
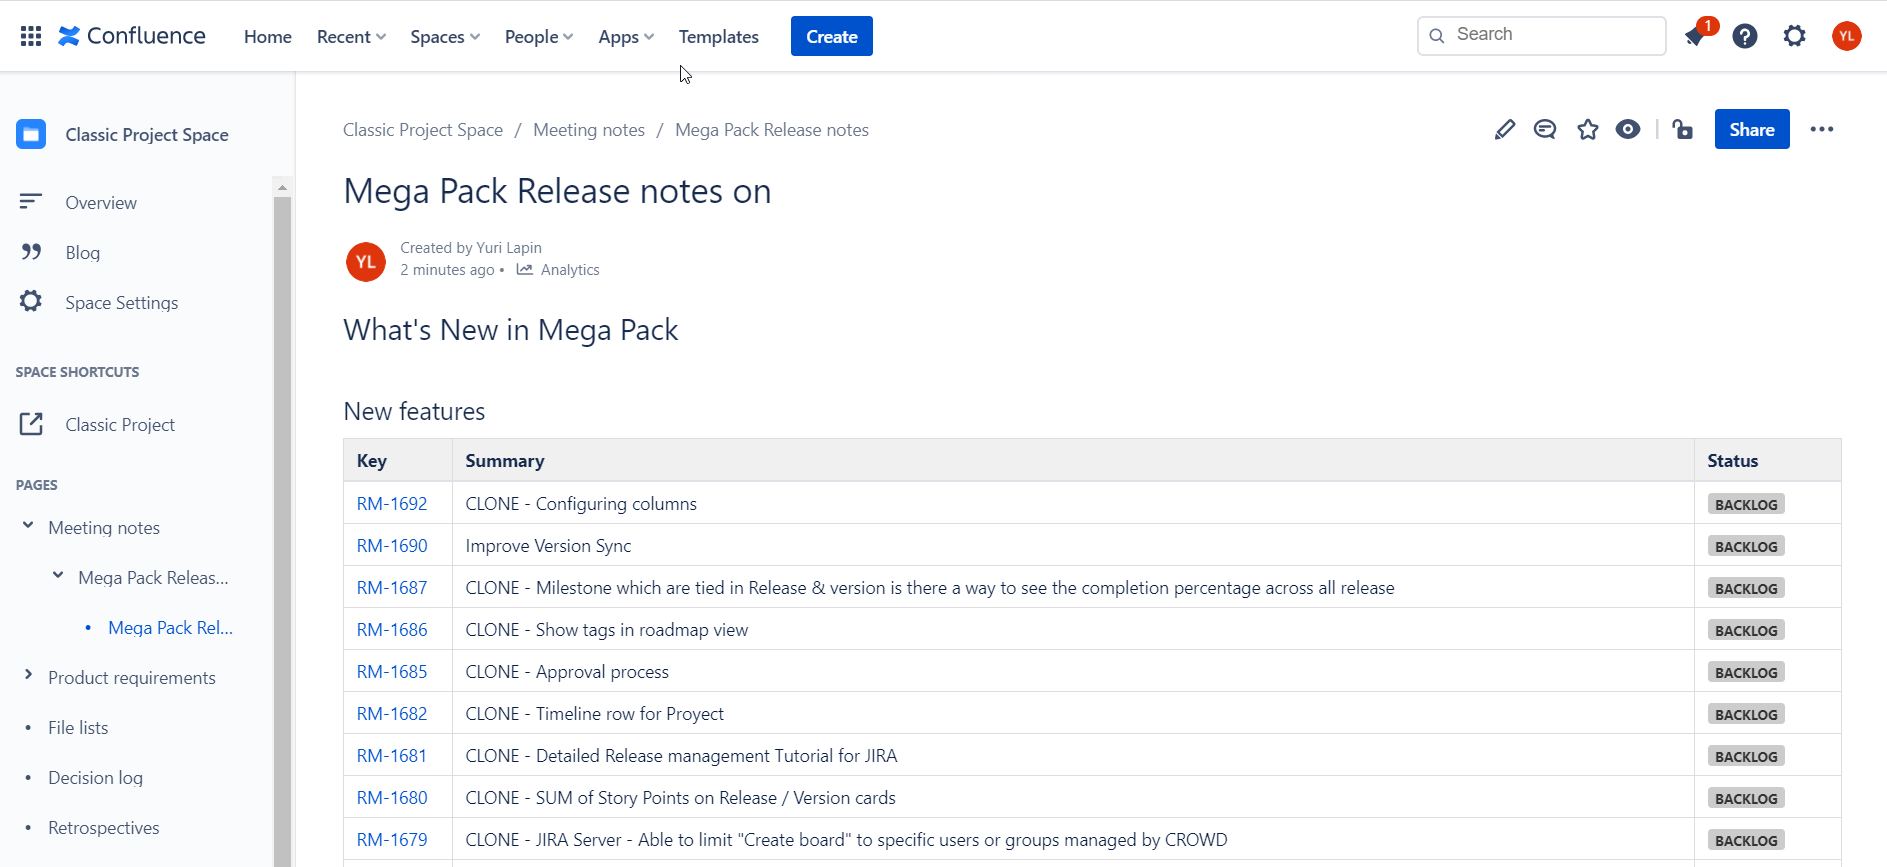
Download generated release notes as HTML or upload to confluence
Release notes templates
Templates operations
User can create, clone or delete release notes template.
While creating a new template user have to specify a template type - whether it goes for versions or packaged?
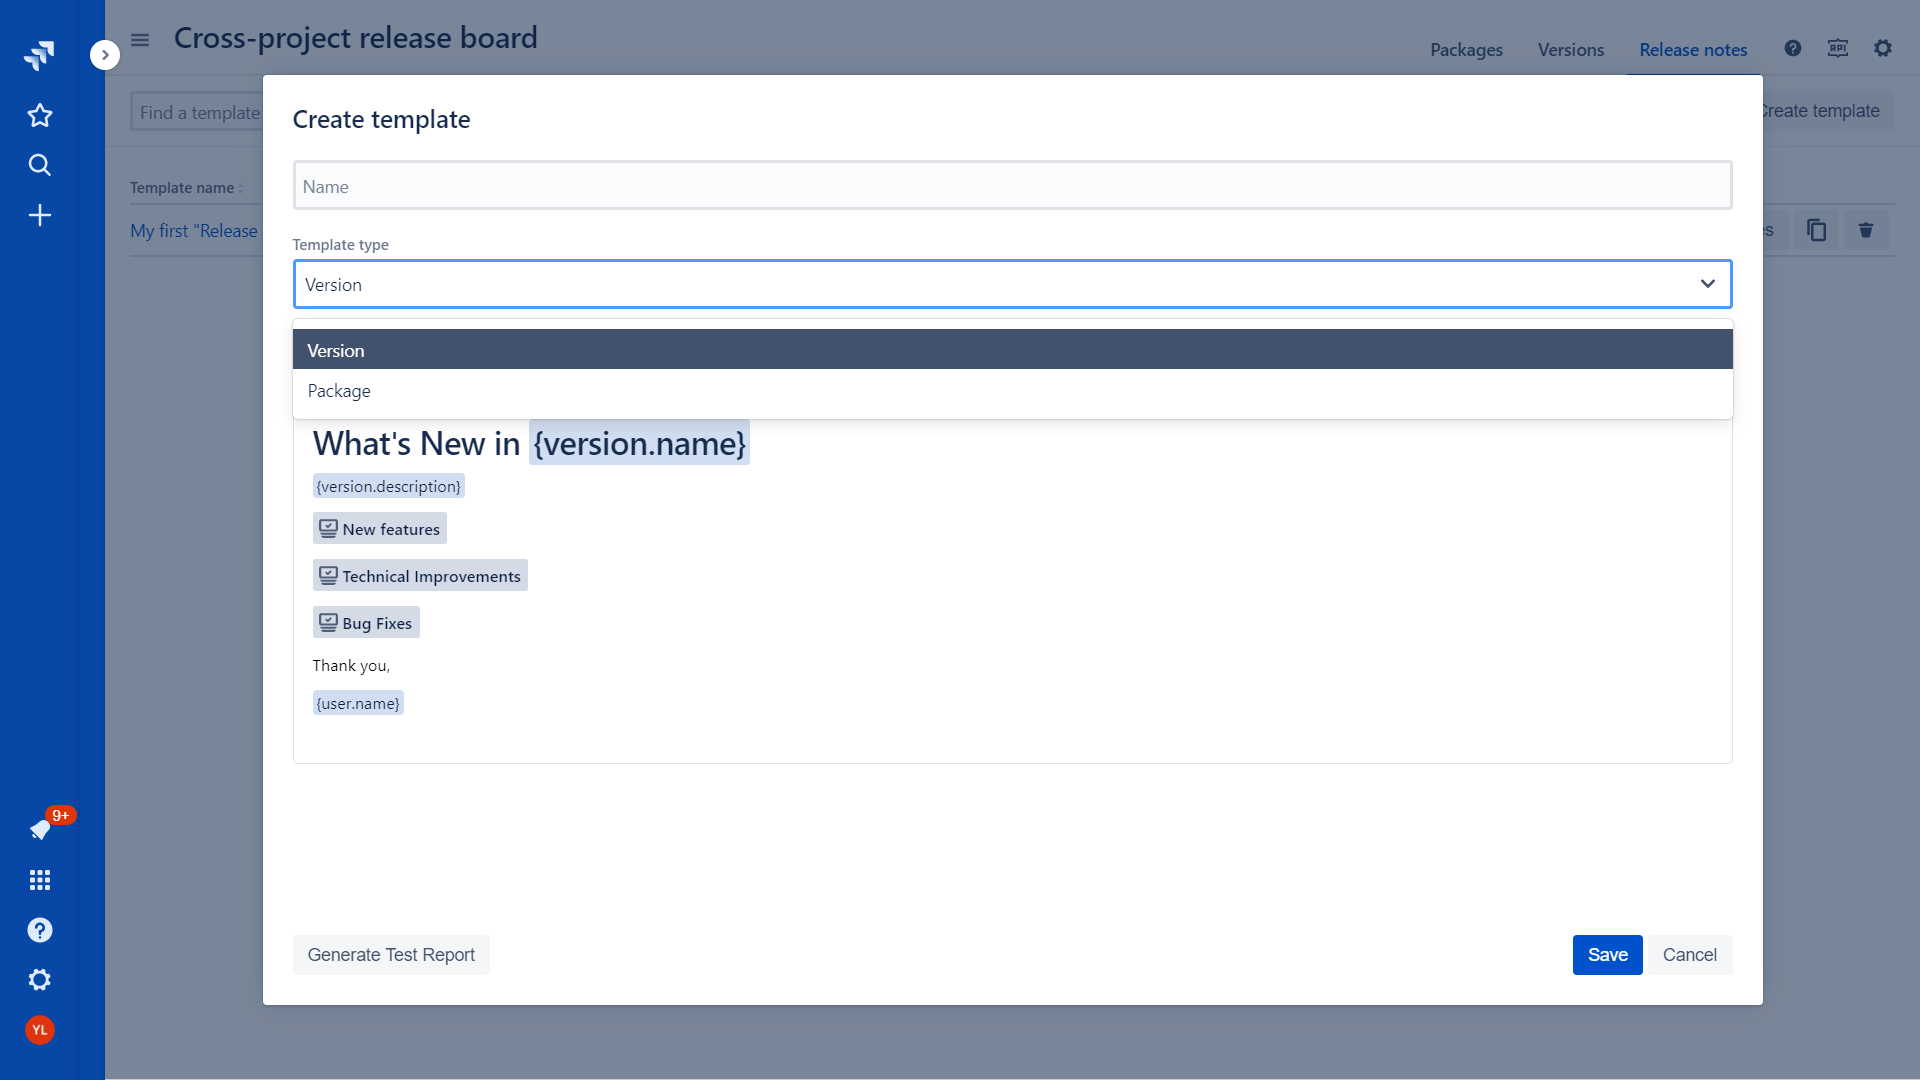
Template type could be defined only during release notes template creation and can not be changed after that.
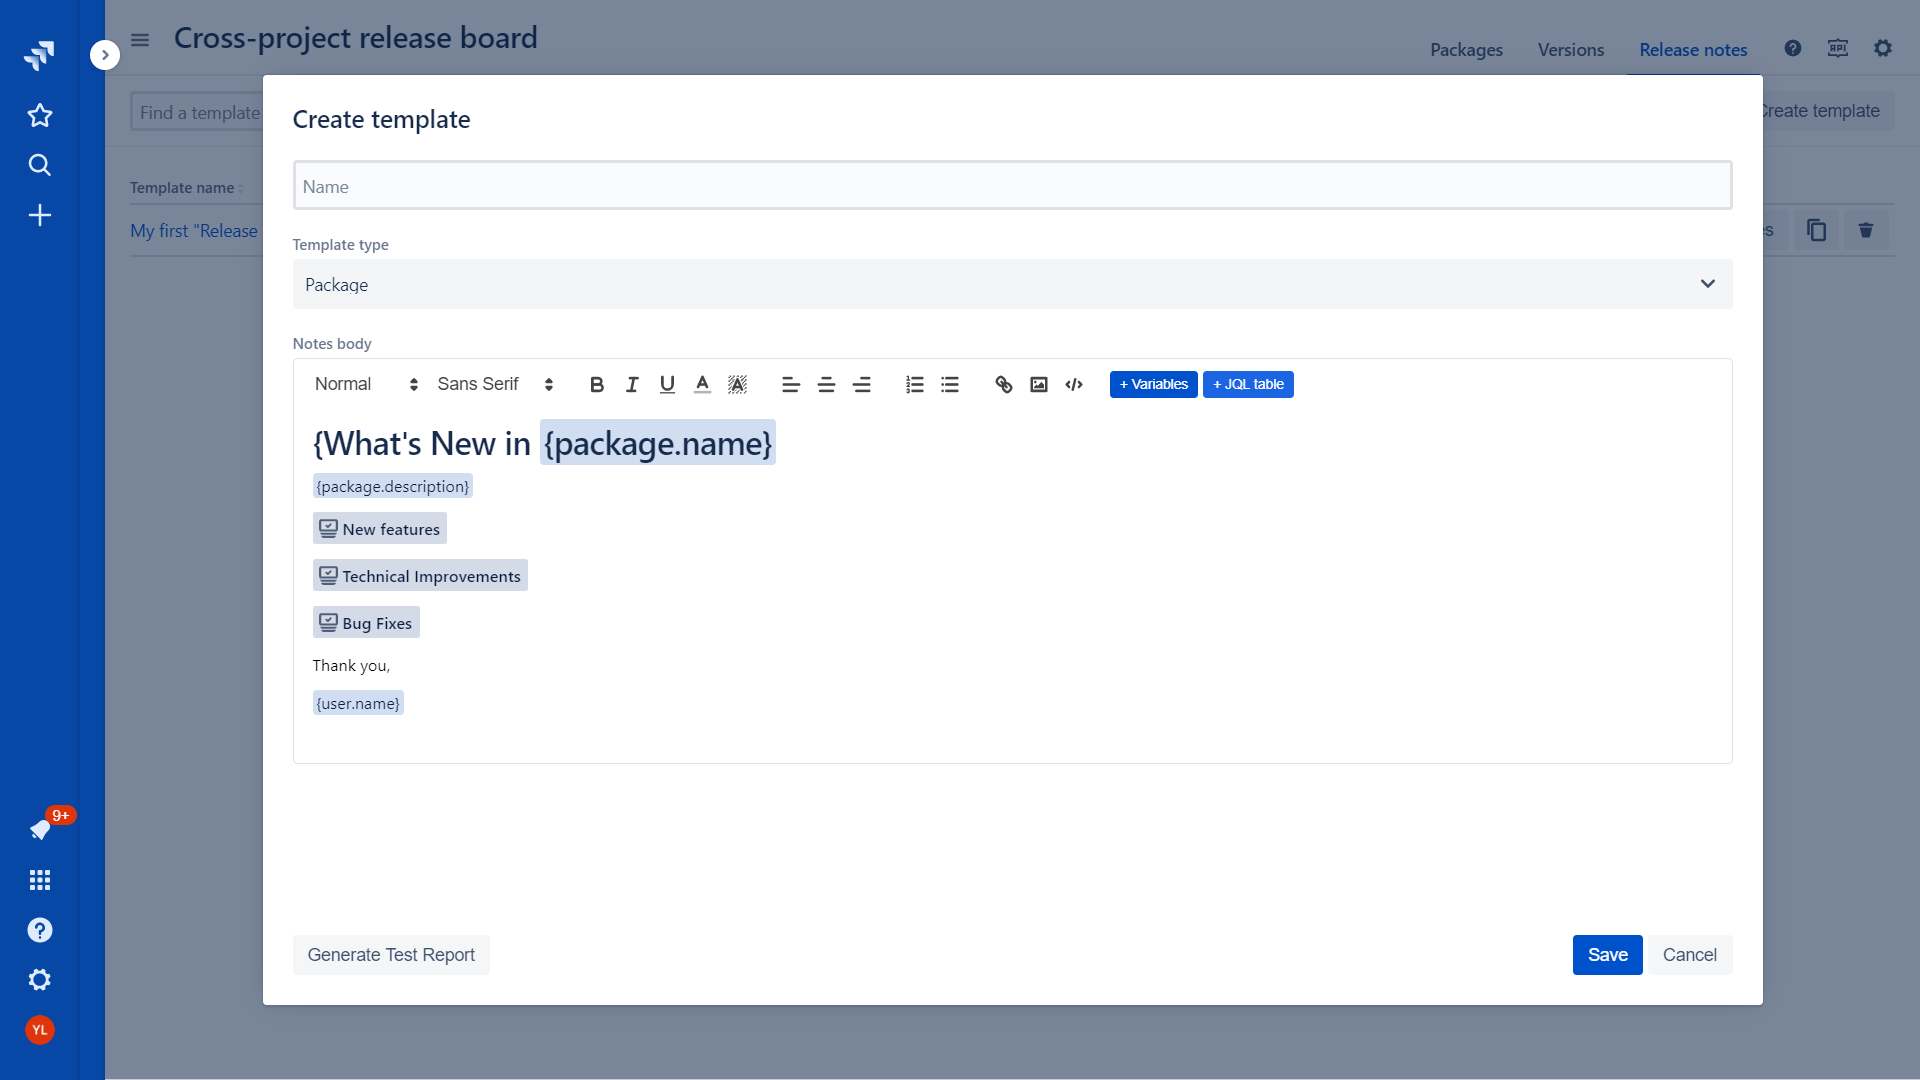
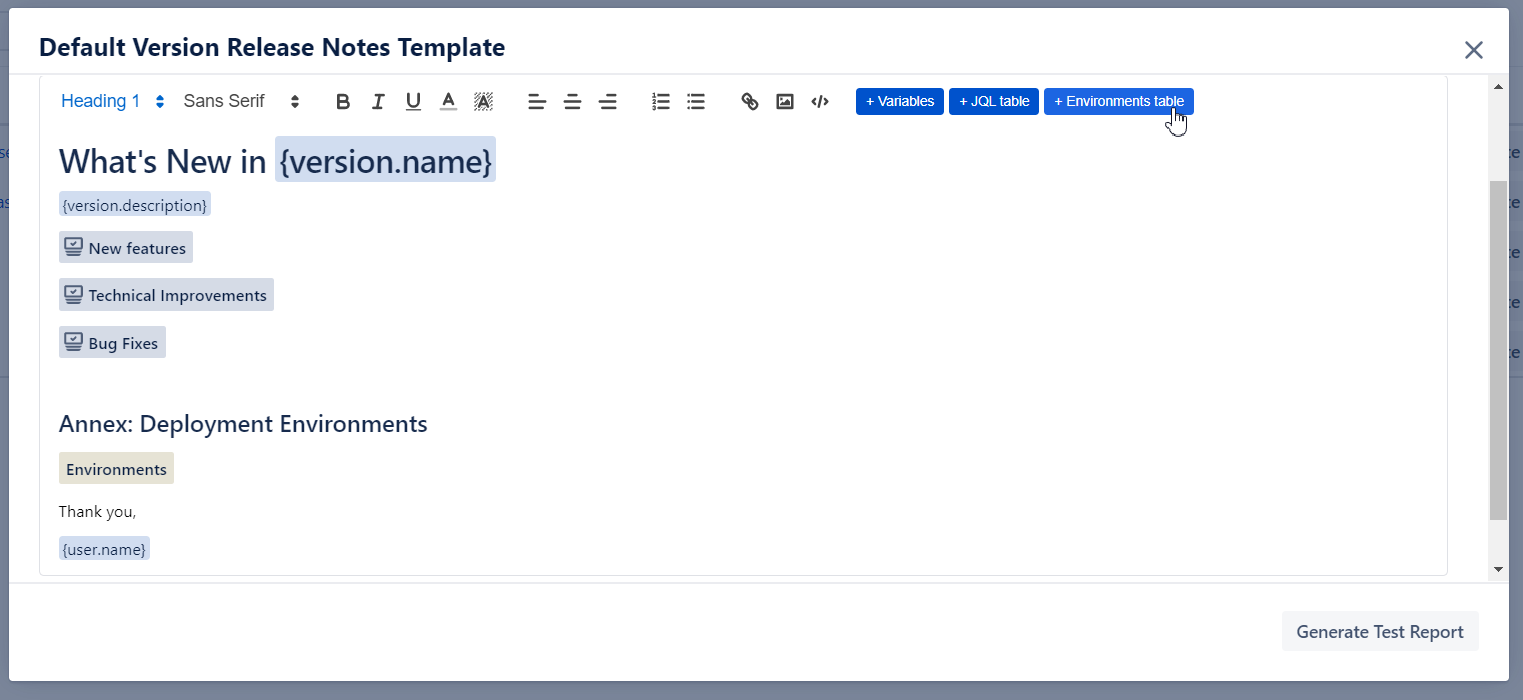
Formatting notes template body and injecting variables
Following features are available for the rich text formatting:

Define text style
3 fonts are supported
Bold, Underlined, Italic styles
Define text color and background
Text alignment
Insert numeric or bullet lists
Insert a link
Pictures
Code block
🆕 Custom HTML tables
Also, the user can inject version/package variables into the template body. The variables will be replaced with actual values from the selected version/package during rendering the notes.
The list of available variables depends on selected template type - version or package.
Version variables
Name
Start date
Release date
Description
“Released” or “Unreleased“ - standard Jira version statuses
Project key (fixVersion only)
Project name (fixVersion only)
User name. Name of a user who generated release notes
Current date. Date when release notes were generated.
Current timestamp. Date and time of release notes were generated.
Package variables
Name
Start date
Release date
Description
User name. Name of a user who generated release notes
Current date. Date when release notes were generated.
Current timestamp. Date and time of release notes were generated.
JQL Table section
Table of listed issues based on JQL query could be added to the release notes body.
Use “+JQL table“ button to add a new table to the template.
The following configuration parameters are available for the table:
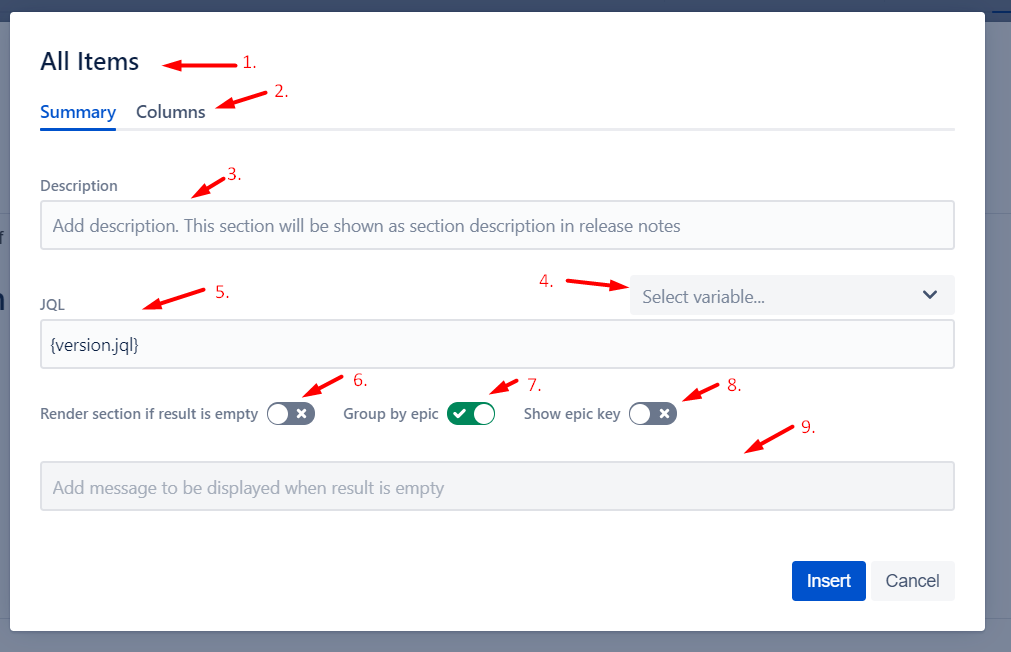
Name of the section. A section with the same name will be added to the release notes.
Columns to be shown in the table. User can select the majority standard and custom Jira fields. See details in the chapter below.
Section description. If the text is specified - it will be added as a plain text after the section name.
JQL variables. In order to build flexible JQL which will use data from the selected version or package the user can inject variables to JQL query. List of available variables depends on the template type
Version specific variables
Version name
Start date
Release date
Version JQL (precompiled JQL which can help to extract the content of real or virtual version)
Project key (
 Not applicable for virtual version)
User name
Current date
Current timestamp
Package specific variables
Start date
Release date
Version JQL (precompiled JQL which can help to extract the content of package)
 Please note that “Versions in package” variable is not supported since October 2020
User name
Current date
Current timestamp
JQL query to extract an issue list.
If the option is enabled the section will be rendered if JQL will return 0 rows. Otherwise, the section will not be rendered at all.
If this option is enabled all the issue will be grouped by respected Jira Epics.
Show epic key if grouping by epic is enabled
The message which will be injected to a template if JQL will return 0 rows. This option will be working in case a switcher #6 is turned on.
Please note that old variables to extract all version or package content (fixVersion={version.name},fixVersion IN ({package.versions})) do not from October 2020.
Please use {version.jql} or {package.jql} instead of fixVersion={version.name} or ,fixVersion IN ({package.versions}) respectively.
This is the change we had to do to introduce virtual versions and align between fixVersions and Virtual versions. Thanks for understanding.
Columns configuration
On the "Columns" tab the user can define a list of columns to be presented the table.
Majority of standard fields and custom fields are available here. We also provide 2 (two) additional "CALCULATED" fields to outline
Parent Epic Name - link to parent epic (if any) with Name to display
Parent Epic Status - status of the parent epic

Also, the user can define various render type where it is applicable.
Available render types are:
Text - just a plan text
Link - link to a presented entity. E.g. issue, user, component, label etc.
Icon - icon for the defined value. For instance issue type icon.
User can change columns order.
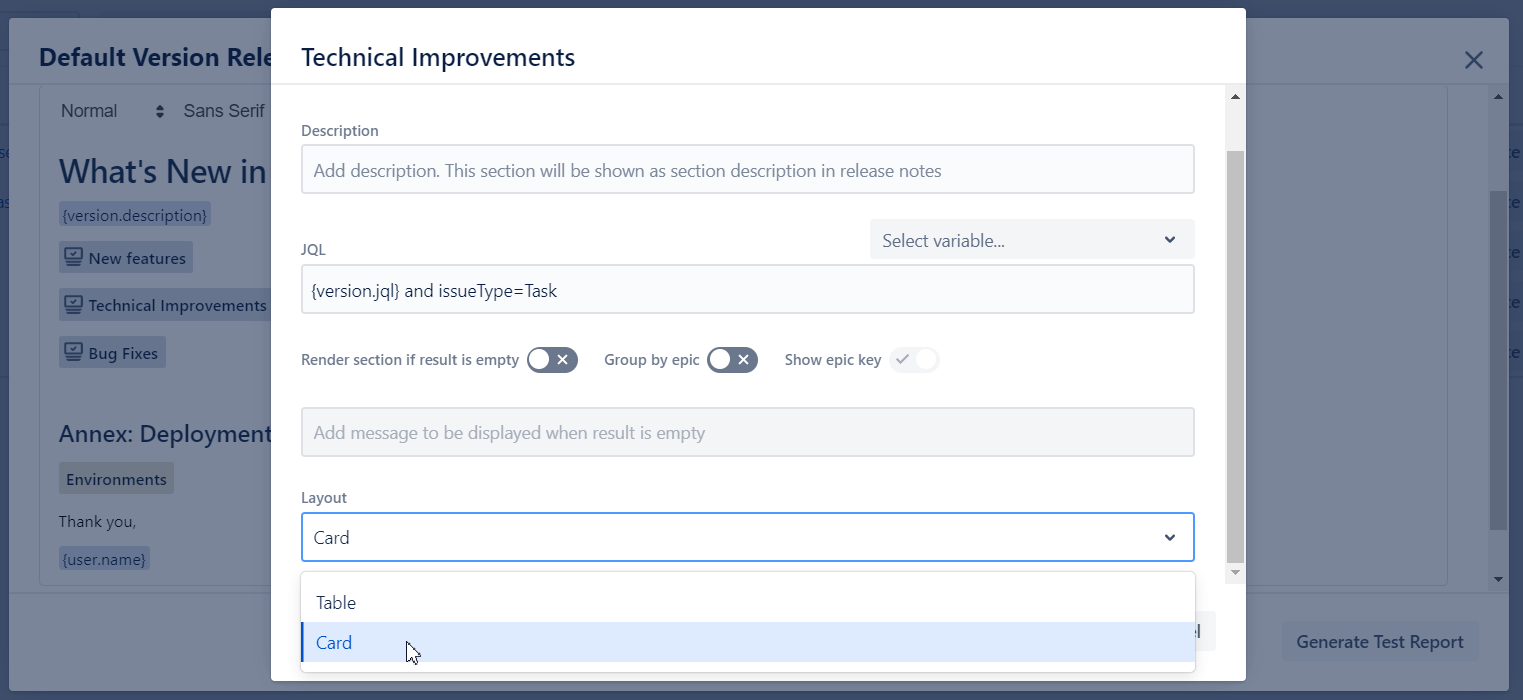
Cards vs Table
If you need to show too many columns in your Release Notes you can select a horizontal layout to show issues as cards.
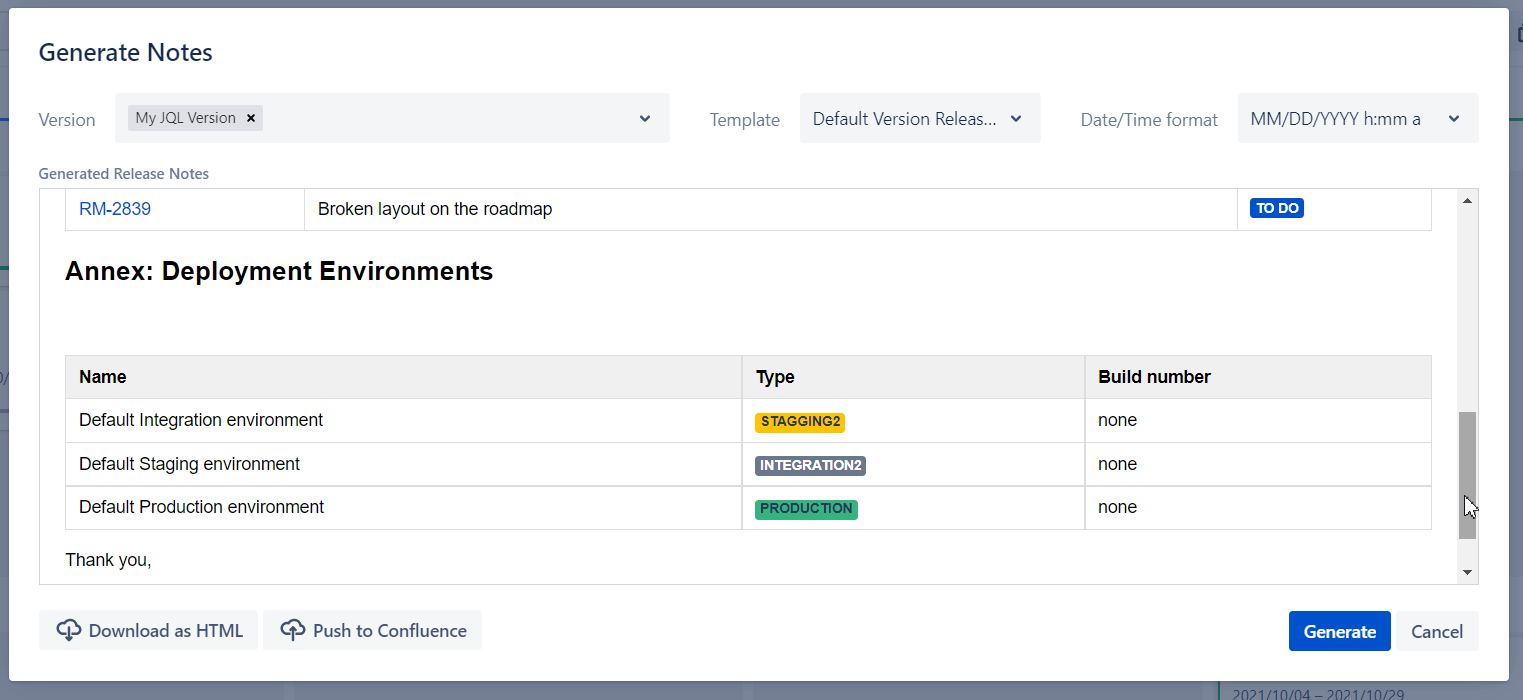
Environments table
Click on “+ Environments table“ to amend you release notes with information about Environments. To outline where your artifacts are deployed and what are build numbers.
To delete it use “Del”, “Backspace“ or right-click and select “Delete”.
Export options
Download as HTML
The output on Release Notes could be downloaded as HTML
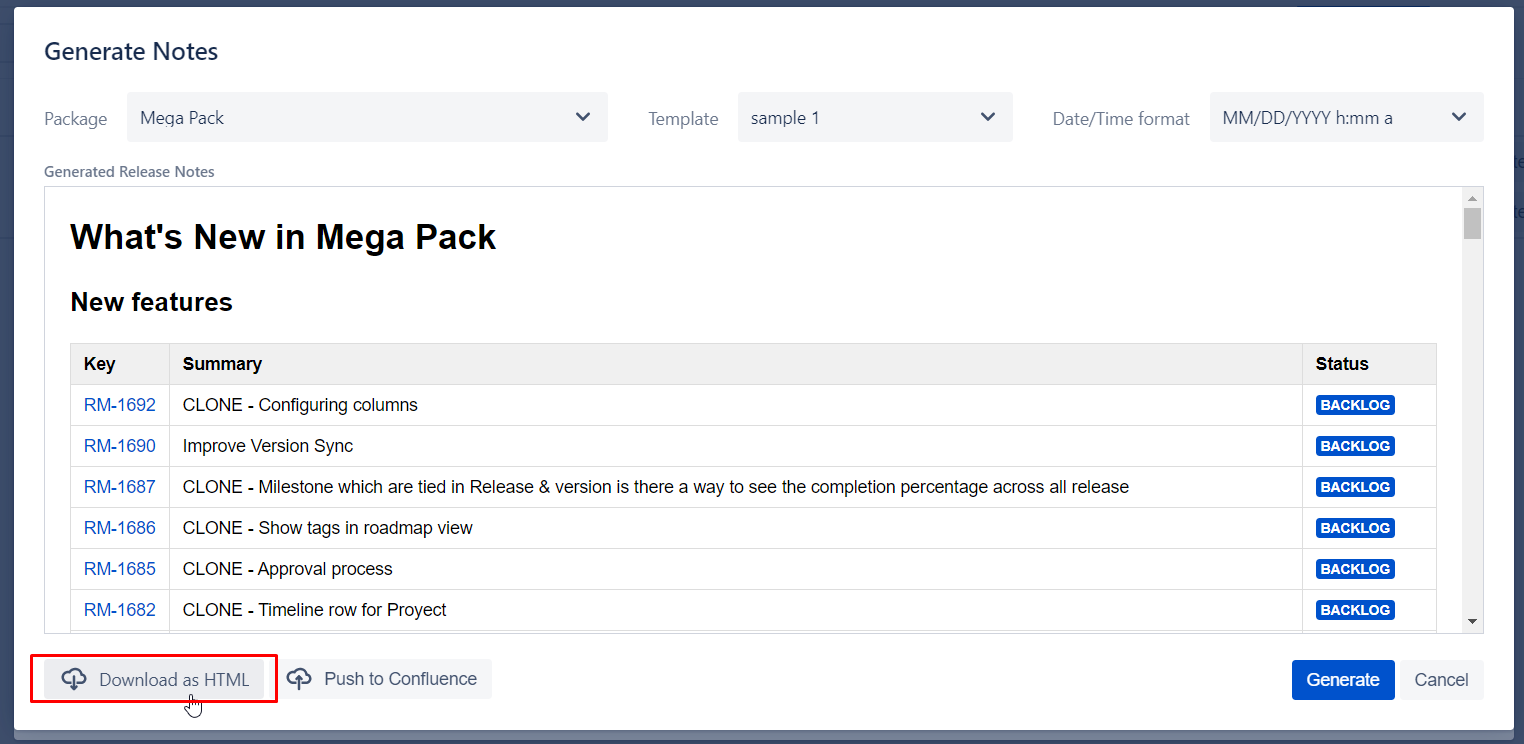
You can use it to Copy/Paste into MS Word, Google Docs, Confluence and any other wiki with (almost) no changes to layout. See other options below plus Upcoming Features for more formats we plan to support shortly.
Upload to Confluence
To substitute “Copy/Paste to Confluence” we implemented a direct integration with Confluence to upload into one of your available spaces.
Getting started
If you are using “Upload to Confluence” the first time and you have not used “Code/Commits“ functionality of our App (in other words you have not yet created an APIToken to connect to Atlassian Ecosystem) you will receive the following dialog while attempting to upload.
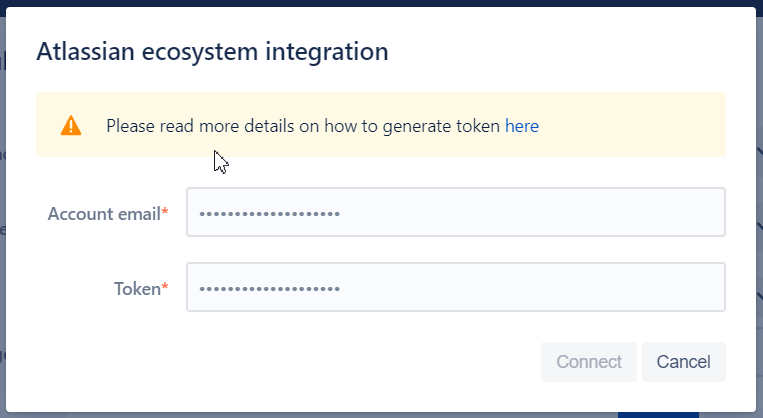
Click on the link to navigate to standard Atlassian APITokens generation page as shown below
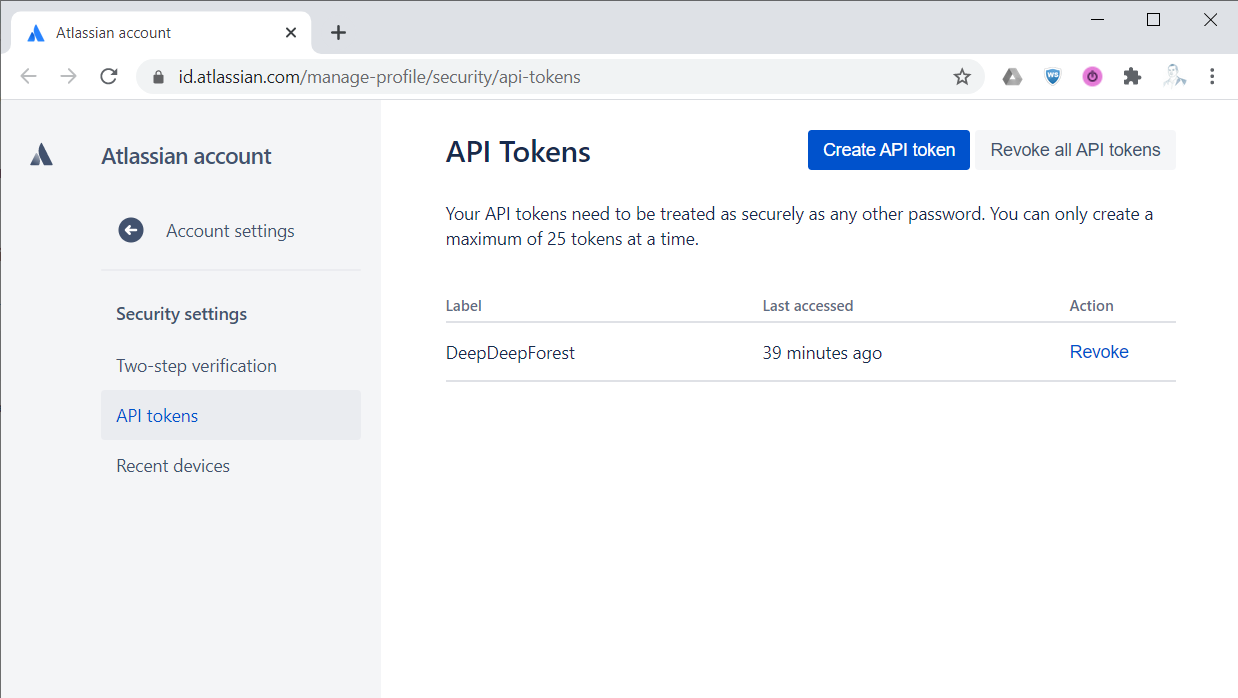
Generate one and copy to clipboard
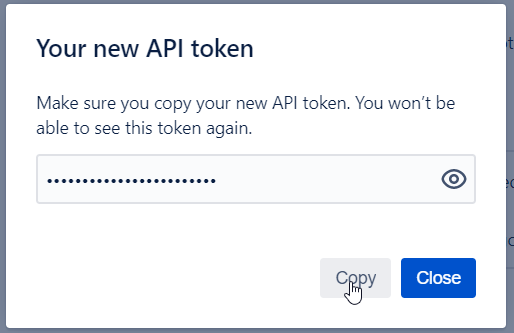
Now go back to Release Management App and specify your email connected with Atlassian account and past your token from the clipboard and click connect.
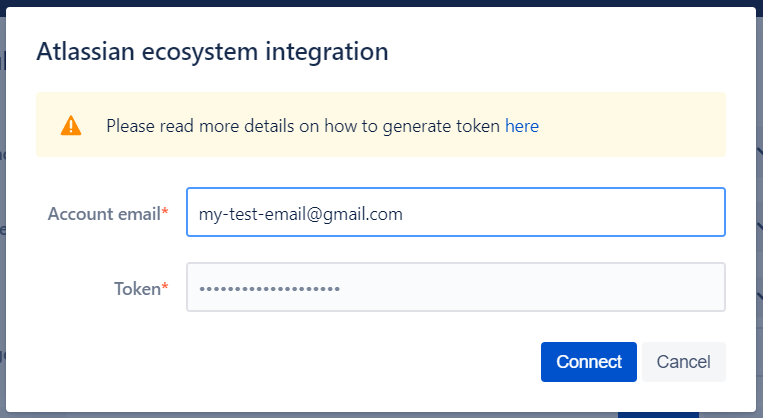
We will keep this token in your cookies and you will be able to share same token between “Code/Commits“ functionality and “Upload to Confluence“. If you want to Revoke it navigate to Atlassian page to do so.
Configuring the destination
If you already connected to confluence you will see the following dialog to help us define the destination to upload your release notes
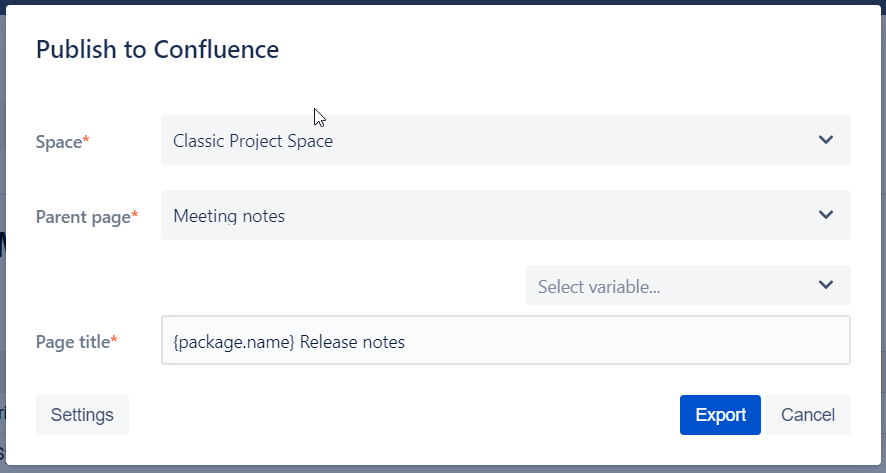
You would need to specify
Confluence Space to shortlist the parent pages
Parent page - any selected page within the Space defined
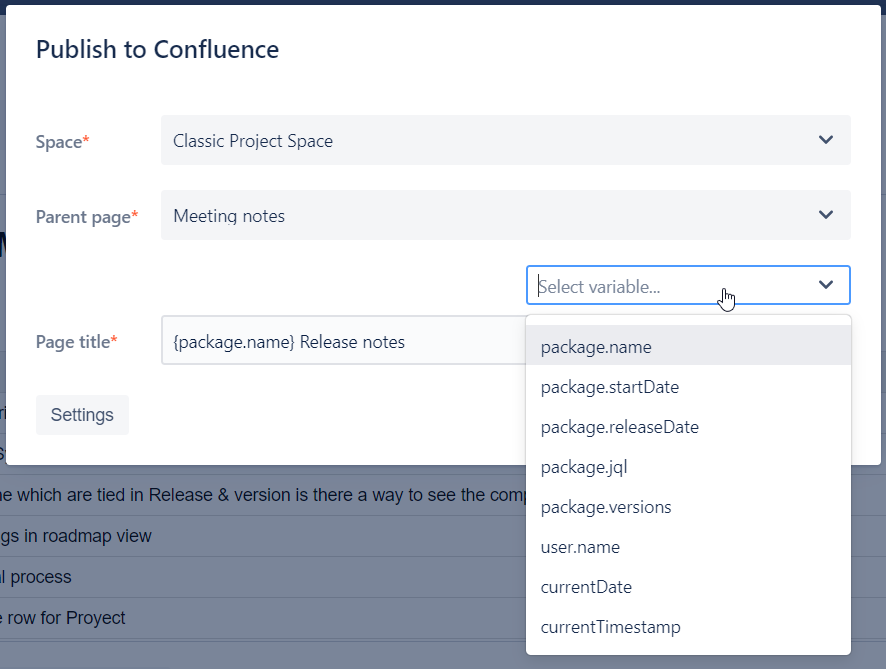
Page title - you can define a custom name of use some of our release/package variables to include in the naming.
Click “Export“.
Navigating to Confluence
Once our App successfully uploaded your release notes to Confluence, the following confirmation will be shown
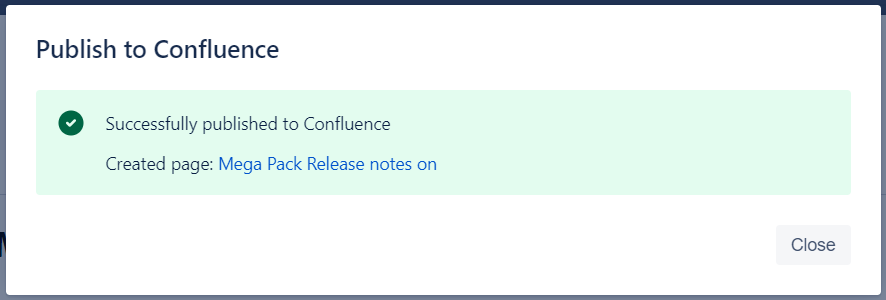
Click on the link specified to navigate to your release notes in confluence.
Upcoming features
Generate by schedule. User can define a schedule for release notes generation or connect it to some triggers. Such as moving version or release to a certain status etc.
Send over email. Release notes will be generated by a trigger and send to relevant recipients over email.
Add more formats of releases notes. PDF and DOC.
If you miss one of those features or would like to suggest your improvements here.